

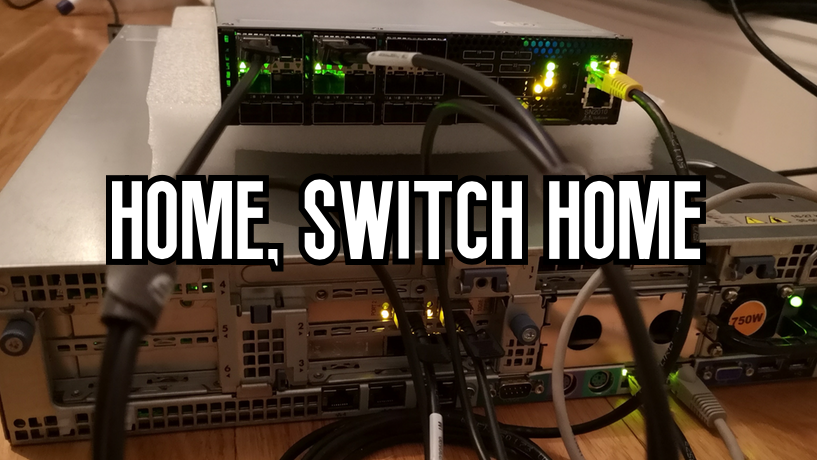
Hello my friend,
Earlier in this year we’ve discussed zero touch provisioning using the Data Centre Fabric Enabler Infrastructure. As always in my articles, I’ve used wonderful VM images, which are freely available on the Internet. Nevertheless, when you deal with real boxes, various caveats might arise. Today we’ll review how to bring Mellanox switch SN 2010 to the operational state running Cumulus Linux using the ZTP framework I’ve already created.
2
3
4
5
retrieval system, or transmitted in any form or by any
means, electronic, mechanical or photocopying, recording,
or otherwise, for commercial purposes without the
prior permission of the author.
Thanks
Special thanks for Avi Alkobi from Mellanox and Pete Crocker and Attilla de Groot from Cumulus for providing me the Mellanox switch and Cumulus license for the tests.
Disclaimer
It is always exciting to do something for the first time. I have never written about any particular network device. Mostly because I always separate, as far as it is possible, the relationship between my current employer, which is The Hut Group as of today, and my blog. And this is the justification, why I typically don’t write about the devices. It’s quite a difficult to get an access to the real network equipment being a blogger. That’s why I was very excited about such an opportunity, when Avi proposed me to write about Mellanox switches a couple of months ago. Finally, I’m writing.
There will be couple of the articles about Mellanox/Cumulus in various contexts. So, this is just the first article.
As a side, but important note, this blog post is using not the laptop lab, but rather a my server-based lab. Hallo, Herr P. 😉
Brief description
My intention in this article is not assess the Mellanox SN 2010 running Cumulus Linux, as you can do that yourself reading the product data sheet. I want to explain my experience as a chap, who builds data centres.

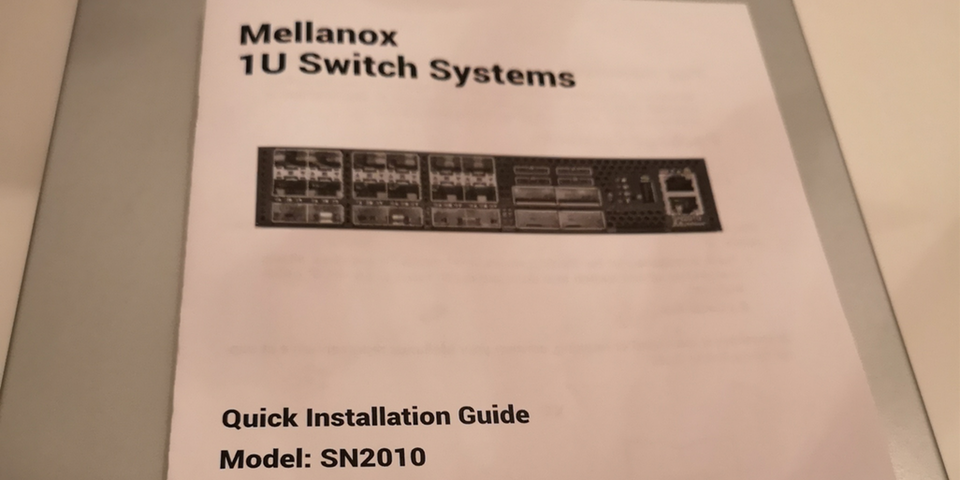
The first interesting point about this switch is that it is half-rack width.
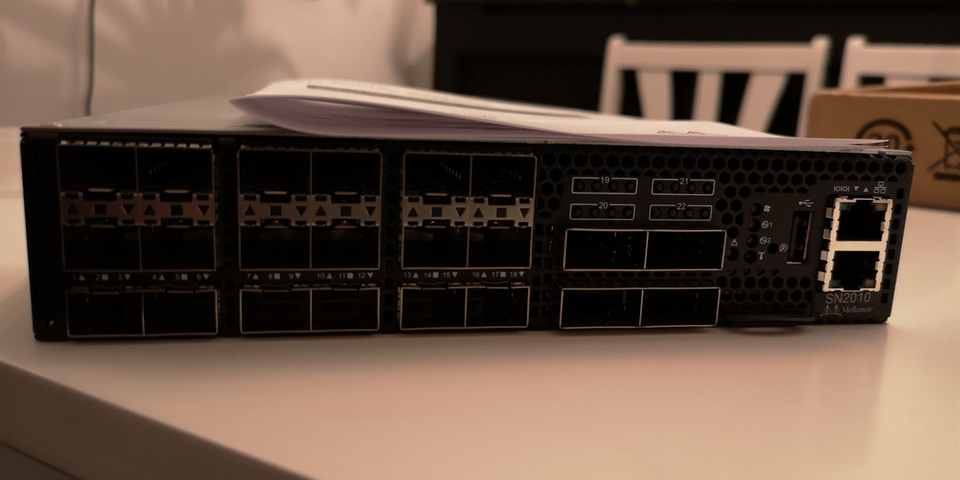
It means, that it is possible to build two such switches in 1RU. Being only 20 cm wide, it has 18x 10/25 GbE customer ports and 4x 40/100 GbE uplinks. The switching capacity of the backplane is 1,7 Tbps, what allows all the interfaces to work on the maximum speed without any oversubscription. Small form-factor is quite useful, if you want to build fully redundant connectivity of the servers using multihoming within the rack. In such a case building two physically separated switches within a single rack unit allows you to reach that without using additional rack units. Each switch has two power-supplies, so by design they are highly redundant as well.
Functionality-wise, these are the traditional data centre switches with full BGP-EVPN/VXLAN, what is the de-fact standard in the current data centres.
Not only, though. There is one awesome feature, which I will cover in the next blogpost.
As said in the beginning, in this article we’ll go through all the steps from opening the box with newly shipped switch to bringing it to fully operational state.
I have written the article for Cumulus Linux 3.7.8 initially, but two days ago they have released new version. So, I had to rewrite it.
What are we going to test?
The following points are covered in this article:
- Upgrading the server to have 2x 10G links.
- Updating Docker containers involved in the ZTP process (DHCP, HTTP).
- Using ZTP to install the latest Cumulus Linux and install the license file on the Mellanox switch.
- Checking the switch is operational.
Software version
The following software components are used in this lab.
Management host:
- CentOS 7.5.1804 with python 2.7.5
- Ansible 2.8.0
- Docker-CE 18.09
Enabler and monitoring infrastructure:
- Base Linux image for container: Alpine Linux 3.9 (https://www.alpinelinux.org/)
- DHCP: ISC DHCP 4.4.1-r2 (https://www.isc.org/downloads/dhcp/)
- HTTP: NGINX 1.14.2-r1 (https://nginx.org/en/)
The Data Centre Fabric:
- Mellanox SN 2010
- Cumulus Linux 3.7.9 [guest VNF]
More details about Data Centre Fabric you may find in the previous articles.
Topology
As the primary focus of this article is to bring the Mellanox SN2010, so we focus more on the physical topology and its connectivity to the management cloud running on Docker containers:
2
3
4
5
6
7
8
9
10
11
12
13
14
15
16
17
18
19
20
21
22
23
24
25
26
27
28
29
30
31
| |
| /\/\/\/\/\/\/\/\/\/\/\/\/\/\/\/\ |
| / Docker cloud \ |
| (c)karneliuk.com / +------+ \ |
| \ +---+ DHCP | / |
| Mellanox/Cumulus lab / | .2+------+ \ |
| \ | / |
| \ 172.17.0.0/16 | +------+ \ |
| +-----------+ \+------------+ +---+ DNS | / |
| | | | +----+ .3+------+ \ |
| | Mellanox | 169.254.255.0/24 | Management |.1 | / |
| | SN2010 | fc00:de:1:ffff::/64 | host | | +------+ \ |
| | | | | +---+ FTP | / |
| | mlx-cl | eth0 enp2s0f1 | carrier |\ | .4+------+ \ |
| | | .21 .1 | | \ | / |
| | | :21 :1 | +------+ | / | +------+ \ |
| | +------------------------+ br0 | | \ +---+ HTTP | / |
| | | | +------+ | \ .5+------+ \ |
| | | | | \ / |
| | | swp1 ens2f0 | +------+ | \/\/\/\/\/\/\/ |
| | +------------------------+ br1 | | |
| | | | +------+ | |
| | | | | |
| | | swp7 ens2f1 | +------+ | |
| | +------------------------+ br2 | | |
| | | | +------+ | |
| | | | | |
| +-----------+ +------------+ |
| |
+-----------------------------------------------------------------------+
In this article we need only ZTP infrastructure, so read the corresponding article for the reference.
On the management host side called carrier.karneliuk.com, we operate with the Linux bridges on the network side. So, the physical interfaces will be mapped to the certain Linux bridges, what makes easy connectivity to the containers and other VMs in future.
If you want to learn more about server lab setup, refer to the corresponding article.
There is no particular GitHub associated with this lab, but CentOS lab setup and Data Centre Fabric project are two the most relevant.
Setting up the server
#1. 10G NIC
Given the status of the server, there were no 10G NICs earlier, what are necessary to connect the data plane interfaces of Mellanox SN 2010 switch to server and vice versa. That’s why the first step was to upgrade the server with new network interface card (NIC). There were a plenty quite a cheap 2x10G SFP+ NICs on the ebay. So if you need to build your server, you can search there (though I don’t know anything about their stability yet). Besides NIC, you would need to have the 10G SFP+ modules and cables.
I was about to buy 10G-SR4 modules, which are not that expensive if to buy them from 3rdparties. A colleague of mine, Ismael, advised to take a look on 10G DAC cables from FS. Good advice, mate! DAC is much cheaper, so fitting the lab (and cabling within the rack) perfectly.
The extension for me looks like as follows:
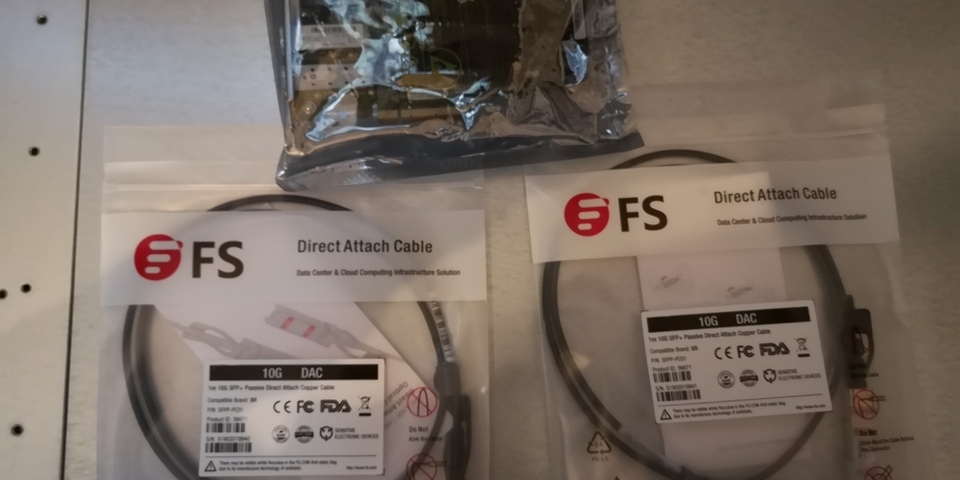
Once these materials were shipped to me, I was able to upgrade the lab:
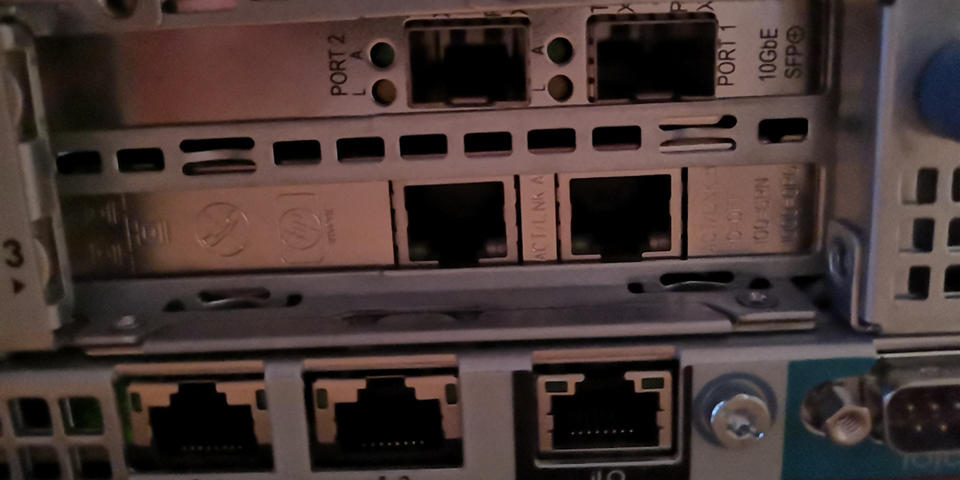
After the NIC was installed, I have re-installed the CentOS and deployed the basic packages I always install for the lab.
#2. Creating Linux bridges on the management host
The next point in the server configuration is to locate the proper interfaces and map them to the network bridges. The process can take quite a time, as I have a lot of network interface in the server:
2
3
4
5
6
7
8
9
10
11
12
13
14
15
16
17
18
19
20
21
22
23
24
25
26
27
28
29
30
31
32
33
34
35
36
37
1: lo: <LOOPBACK,UP,LOWER_UP> mtu 65536 qdisc noqueue state UNKNOWN mode DEFAULT group default qlen 1000
link/loopback 00:00:00:00:00:00 brd 00:00:00:00:00:00
2: enp2s0f0: <BROADCAST,MULTICAST,UP,LOWER_UP> mtu 1500 qdisc mq state UP mode DEFAULT group default qlen 1000
link/ether 98:4b:e1:07:4b:b0 brd ff:ff:ff:ff:ff:ff
3: enp2s0f1: <NO-CARRIER,BROADCAST,MULTICAST,UP> mtu 1500 qdisc mq master br0 state DOWN mode DEFAULT group default qlen 1000
link/ether 98:4b:e1:07:4b:b2 brd ff:ff:ff:ff:ff:ff
4: enp3s0f0: <NO-CARRIER,BROADCAST,MULTICAST,UP> mtu 1500 qdisc mq state DOWN mode DEFAULT group default qlen 1000
link/ether 98:4b:e1:07:4b:b4 brd ff:ff:ff:ff:ff:ff
5: enp3s0f1: <NO-CARRIER,BROADCAST,MULTICAST,UP> mtu 1500 qdisc mq state DOWN mode DEFAULT group default qlen 1000
link/ether 98:4b:e1:07:4b:b6 brd ff:ff:ff:ff:ff:ff
6: enp9s0f0: <NO-CARRIER,BROADCAST,MULTICAST,UP> mtu 1500 qdisc pfifo_fast state DOWN mode DEFAULT group default qlen 1000
link/ether 00:26:55:e4:ac:b1 brd ff:ff:ff:ff:ff:ff
7: ens2f0: <NO-CARRIER,BROADCAST,MULTICAST,UP> mtu 1500 qdisc mq state DOWN mode DEFAULT group default qlen 1000
link/ether e8:39:35:a5:5e:40 brd ff:ff:ff:ff:ff:ff
8: enp9s0f1: <NO-CARRIER,BROADCAST,MULTICAST,UP> mtu 1500 qdisc pfifo_fast state DOWN mode DEFAULT group default qlen 1000
link/ether 00:26:55:e4:ac:b0 brd ff:ff:ff:ff:ff:ff
9: enp10s0f0: <NO-CARRIER,BROADCAST,MULTICAST,UP> mtu 1500 qdisc pfifo_fast state DOWN mode DEFAULT group default qlen 1000
link/ether 00:26:55:e4:ac:b3 brd ff:ff:ff:ff:ff:ff
10: ens2f1: <NO-CARRIER,BROADCAST,MULTICAST,UP> mtu 1500 qdisc mq state DOWN mode DEFAULT group default qlen 1000
link/ether e8:39:35:a5:5e:44 brd ff:ff:ff:ff:ff:ff
11: enp10s0f1: <NO-CARRIER,BROADCAST,MULTICAST,UP> mtu 1500 qdisc pfifo_fast state DOWN mode DEFAULT group default qlen 1000
link/ether 00:26:55:e4:ac:b2 brd ff:ff:ff:ff:ff:ff
12: ens3f0: <NO-CARRIER,BROADCAST,MULTICAST,UP> mtu 1500 qdisc pfifo_fast state DOWN mode DEFAULT group default qlen 1000
link/ether 00:26:55:ec:87:60 brd ff:ff:ff:ff:ff:ff
13: ens3f1: <NO-CARRIER,BROADCAST,MULTICAST,UP> mtu 1500 qdisc pfifo_fast state DOWN mode DEFAULT group default qlen 1000
link/ether 00:26:55:ec:87:61 brd ff:ff:ff:ff:ff:ff
14: br0: <NO-CARRIER,BROADCAST,MULTICAST,UP> mtu 1500 qdisc noqueue state DOWN mode DEFAULT group default qlen 1000
link/ether 98:4b:e1:07:4b:b2 brd ff:ff:ff:ff:ff:ff
15: virbr0: <NO-CARRIER,BROADCAST,MULTICAST,UP> mtu 1500 qdisc noqueue state DOWN mode DEFAULT group default qlen 1000
link/ether 52:54:00:bc:5f:9c brd ff:ff:ff:ff:ff:ff
16: virbr0-nic: <BROADCAST,MULTICAST> mtu 1500 qdisc pfifo_fast master virbr0 state DOWN mode DEFAULT group default qlen 1000
link/ether 52:54:00:bc:5f:9c brd ff:ff:ff:ff:ff:ff
17: docker0: <NO-CARRIER,BROADCAST,MULTICAST,UP> mtu 1500 qdisc noqueue state DOWN mode DEFAULT group default
link/ether 02:42:40:d6:b4:4e brd ff:ff:ff:ff:ff:ff
18: br-b25d39fff88d: <NO-CARRIER,BROADCAST,MULTICAST,UP> mtu 1500 qdisc noqueue state DOWN mode DEFAULT group default
link/ether 02:42:e0:79:f5:aa brd ff:ff:ff:ff:ff:ff
Having done some investigation about the way to locate interfaces, I have found a good built-in Linux tool, which I want to share with you. This tool is called ethtool. It works as follows:
2
3
4
5
6
7
8
9
10
11
12
13
14
15
16
17
18
Settings for ens2f0:
Supported ports: [ FIBRE ]
Supported link modes: 1000baseT/Full
10000baseT/Full
Supported pause frame use: Symmetric
Supports auto-negotiation: No
Supported FEC modes: Not reported
Advertised link modes: Not reported
Advertised pause frame use: No
Advertised auto-negotiation: No
Advertised FEC modes: Not reported
Speed: Unknown!
Duplex: Unknown! (255)
Port: Direct Attach Copper
PHYAD: 0
Transceiver: internal
Auto-negotiation: off
You just put the ethtoolinterface_name and it provides the details of the interface, what was helpful to locate the 10G ports. The 1G is easier to find, as I’m using built-it 1G interfaces, and 1 of 4 is already up, connected to the home router. When the interfaces are found, we can map them appropriately to the bridges:
2
3
4
5
6
7
8
9
10
11
12
13
14
15
16
17
18
19
$ sudo brctl addbr br1
$ sudo brctl addif br1 ens2f0
$ sudo ifconfig br1 up
$ sudo ifconfig ens2f0 up
$ sudo brctl addbr br2
$ sudo brctl addif br2 ens2f1
$ sudo ifconfig br2 up
$ sudo ifconfig ens2f1 up
$ brctl show
bridge name bridge id STP enabled interfaces
br-b25d39fff88d 8000.0242e079f5aa no
br0 8000.984be1074bb2 no enp2s0f1
br1 8000.e83935a55e40 no ens2f0
br2 8000.e83935a55e44 no ens2f1
docker0 8000.024240d6b44e no
virbr0 8000.525400bc5f9c yes virbr0-nic
br0 is created during running the lab deployment script.
Once the bridges are created, we verify the proper mapping of the ports on the NICs.
The last verification here is the IP address of the br0:
2
3
4
5
6
7
8
9
14: br0: <NO-CARRIER,BROADCAST,MULTICAST,UP> mtu 1500 qdisc noqueue state DOWN group default qlen 1000
link/ether 98:4b:e1:07:4b:b2 brd ff:ff:ff:ff:ff:ff
inet 169.254.255.1/24 brd 169.254.255.255 scope link noprefixroute br0
valid_lft forever preferred_lft forever
inet6 fc00:de:1:ffff::1/64 scope global noprefixroute
valid_lft forever preferred_lft forever
inet6 fe80::cec:2bff:fee0:5642/64 scope link noprefixroute
valid_lft forever preferred_lft forever
#3. Running the Docker
Docker is used as a platform for all the ZTP applications we are running in the lab, but it isn’t launched by default. So, we need to launch it:
2
3
4
5
6
7
8
9
10
11
12
13
14
15
16
17
18
19
20
21
22
23
24
$ sudo systemctl start docker.service
● docker.service - Docker Application Container Engine
Loaded: loaded (/usr/lib/systemd/system/docker.service; disabled; vendor preset: disabled)
Active: active (running) since Tue 2019-09-10 19:08:19 BST; 28min ago
Docs: https://docs.docker.com
Main PID: 15505 (dockerd)
Tasks: 34
Memory: 175.0M
CGroup: /system.slice/docker.service
├─15505 /usr/bin/dockerd -H fd:// --containerd=/run/containerd/containerd.sock
└─16957 /usr/bin/docker-proxy -proto tcp -host-ip 0.0.0.0 -host-port 80 -container-ip 172.17.0.2 -container-port 80
Sep 10 19:08:16 carrier.karneliuk.com dockerd[15505]: time="2019-09-10T19:08:16.165311138+01:00" level=info msg="[graphdriver] using prior storage driver: overlay2"
Sep 10 19:08:16 carrier.karneliuk.com dockerd[15505]: time="2019-09-10T19:08:16.930109055+01:00" level=info msg="Loading containers: start."
Sep 10 19:08:18 carrier.karneliuk.com dockerd[15505]: time="2019-09-10T19:08:18.359747664+01:00" level=info msg="Default bridge (docker0) is assigned with an IP address 172.17.0.0/16. Dae... IP address"
Sep 10 19:08:18 carrier.karneliuk.com dockerd[15505]: time="2019-09-10T19:08:18.730035067+01:00" level=info msg="Loading containers: done."
Sep 10 19:08:18 carrier.karneliuk.com dockerd[15505]: time="2019-09-10T19:08:18.976754959+01:00" level=info msg="Docker daemon" commit=6a30dfc graphdriver(s)=overlay2 version=19.03.2
Sep 10 19:08:18 carrier.karneliuk.com dockerd[15505]: time="2019-09-10T19:08:18.976970115+01:00" level=info msg="Daemon has completed initialization"
Sep 10 19:08:19 carrier.karneliuk.com dockerd[15505]: time="2019-09-10T19:08:19.046473176+01:00" level=info msg="API listen on /var/run/docker.sock"
Sep 10 19:08:19 carrier.karneliuk.com systemd[1]: Started Docker Application Container Engine.
Sep 10 19:22:30 carrier.karneliuk.com dockerd[15505]: time="2019-09-10T19:22:30.732693645+01:00" level=info msg="ignoring event" module=libcontainerd namespace=moby topic=/tasks/delete ty....TaskDelete"
Sep 10 19:22:30 carrier.karneliuk.com dockerd[15505]: time="2019-09-10T19:22:30.800562401+01:00" level=warning msg="995d825c8499567828248232d67cc426d5742931afe7fcee58c9b02467d5f8b4 cleanup: failed to...
Hint: Some lines were ellipsized, use -l to show in full.
Docker is up and running, so we can start with the ZTP applications. Actually, we need two of them: DHCP and HTTP
#4. DHCP container
The creation of the DHCP container was explained earlier.
When I started about thinking how to bring the Mellanox SN 2010 switch to the operation, I was a bit worried, as I don’t have a console cable in my lab, which I can use for the server configuration. And then I realised, that I have created ZTP infrastructure earlier, and I don’t need it. The only thing I need is the MAC address of the eth0 interface of the management switch to create proper entry in DHCP:
2
3
4
5
6
7
8
9
10
11
12
13
14
15
16
17
18
19
20
21
22
23
24
25
26
27
28
$ cat data/dhcpd.conf
# dhcpd.conf
# private DHCP options
option cumulus-provision-url code 239 = text;
default-lease-time 600;
max-lease-time 7200;
authoritative;
# IPv4 OOB management subnet for the data center
subnet 169.254.255.0 netmask 255.255.255.0 {
range 169.254.255.129 169.254.255.254;
option domain-name-servers 169.254.255.1;
option domain-name "de.karnet.com";
option routers 169.254.255.1;
option broadcast-address 169.254.255.255;
}
# IPv4 OOB // Fixed lease
host mlx-cl {
hardware ethernet b8:59:9f:09:99:6c;
fixed-address 169.254.255.21;
option host-name "mlx-cl";
option cumulus-provision-url "http://169.254.255.1/cumulus-ztp.sh";
}
The throughout explanation of the DHCP in Docker container was done in a separate article, so we just run the container containing the configuration file provided above:
2
3
4
-v $PWD/data/dhcpd.conf:/etc/dhcp/dhcpd.conf:ro \
--name dcf_dhcp akarneliuk/dcf_dhcp
5baa5d3bc64bc501689f2c268bf2f9dc3a9b3d3b89b4a8efa12c5a58af261a83
#5. ZTP script and HTTP container
The last thing we need to do on the server as a preparation, before we switch to the Mellanox SN 2010 switch itself, is to finalise the ZTP script:
2
3
4
5
6
7
8
9
10
11
12
13
14
15
16
17
18
19
20
21
22
23
24
25
26
27
28
29
30
31
32
33
34
35
36
37
38
39
40
41
42
43
44
45
46
47
48
49
$ cat data/website/cumulus-ztp.sh
#!/bin/bash
# CUMULUS-AUTOPROVISIONING
set -e
echo "Running ZTP..."
# Updating SW if necessary
#
CUMULUS_TARGET_RELEASE=3.7.9
CUMULUS_CURRENT_RELEASE=$(cat /etc/lsb-release | grep RELEASE | cut -d "=" -f2)
PLATFORM_NAME=$(/usr/cumulus/bin/decode-syseeprom | grep 'Platform Name' | awk '{print $5}')
case ${PLATFORM_NAME} in
x86_64-mlnx_*) VENDOR_IMAGE=mlx-amd64;;
esac
IMAGE_ADDRESS="http://169.254.255.1/images/cumulus-linux-${CUMULUS_TARGET_RELEASE}-${VENDOR_IMAGE}.bin"
if [ "${CUMULUS_TARGET_RELEASE}" != "${CUMULUS_CURRENT_RELEASE}" ]; then
/usr/cumulus/bin/onie-install -f -a -i ${IMAGE_ADDRESS} && reboot
else
:
fi
# install a license
#
echo 'magic_user|magic_license' | /usr/cumulus/bin/cl-license -i
# Restart switchd
#
echo "Restarting switchd after installing license"
CL_VERSION=$(grep DISTRIB_RELEASE /etc/lsb-release | sed -e "s/^.*=//" -e "s/\..*$//")
case $CL_VERSION in
2) service switchd restart;;
3) systemctl restart switchd.service;;
*) echo "Error: unknown Cumulus Linux version in /etc/lsb-release"; exit 1;;
esac
# Create management VRF
net add vrf mgmt
net add time zone
net add dns nameserver ipv4 8.8.8.8 vrf mgmt
net commit
sleep 5
exit 0
The basics for this ZTP script were taken from the official Cumulus Linux webpage.
The script has 3 major parts:
- It checks if the desired Cumulus Linux version is installed on the switch. If not, it downloads then the appropriate SW depending on the HW manufacturer and reboots the switch. As Cumulus can run not only on Mellanox, it is important we install the proper image.
- It installs the necessary license and reboots the device, as it is necessary to get the license installed
- It creates some basic configuration, such as management VRF and so on.
Besides the ZTP script, obviously, the important files on the HTTP server are the proper SW images:
2
3
4
5
6
7
8
9
10
11
12
13
14
15
16
17
18
19
20
21
22
23
.:
total 8
drwxrwxr-x. 3 aaa aaa 93 Sep 10 21:56 data
-rw-rw-r--. 1 aaa aaa 240 Sep 5 21:27 Dockerfile
-rw-rw-r--. 1 aaa aaa 396 Sep 5 21:27 README.md
./data:
total 15120
-rw-rw-r--. 1 aaa aaa 455 Sep 5 21:27 default.conf
-rw-rw-r--. 1 aaa aaa 2818 Sep 5 21:27 nginx.conf
drwxrwxr-x. 3 aaa aaa 60 Sep 14 17:55 website
./data/website:
total 8
-rw-rw-r--. 1 aaa aaa 1203 Sep 14 17:55 cumulus-ztp.sh
drwxrwxr-x. 2 aaa aaa 88 Sep 14 17:58 images
-rw-rw-r--. 1 aaa aaa 160 Sep 5 21:27 index.html
./data/website/images:
total 490380
-rw-r--r--. 1 aaa aaa 274001371 Sep 5 22:10 cumulus-linux-3.7.8-mlx-amd64.bin
-rw-r--r--. 1 aaa aaa 228146651 Sep 14 17:58 cumulus-linux-3.7.9-mlx-amd64.bin
Once we place all the files in the folder we attach to the container, we can launch it:
2
3
4
5
6
-v $PWD/data/nginx.conf:/etc/nginx/nginx.conf:ro \
-v $PWD/data/default.conf:/etc/nginx/conf.d/default.conf:ro \
-v $PWD/data/website:/var/www/html/website \
--name dcf_http akarneliuk/dcf_http
6ef7e1554caf4db375a4162386e1e9e831c7f3549805a574f389ccbf57e6314e
Details of the HTTP container for Docker in context of ZTP you can find in a dedicated article.
Let’s check the status of the Docker containers:
2
3
4
CONTAINER ID IMAGE COMMAND CREATED STATUS PORTS NAMES
6ef7e1554caf akarneliuk/dcf_http "nginx" 31 seconds ago Up 29 seconds 0.0.0.0:80->80/tcp dcf_http
5baa5d3bc64b akarneliuk/dcf_dhcp "/usr/sbin/dhcpd -4 …" 6 minutes ago Up 6 minutes dcf_dhcp
#6. Linux firewall (iptables)
The very last piece of the server configuration is the Linux firewall (also known as iptables). By default, everything is forbidden, so we need to allow ports for HTTP and DHCP:
2
3
4
5
6
7
8
9
10
11
12
13
14
15
16
17
18
19
20
$ sudo iptables -A INPUT -p tcp --dport 80 -j ACCEPT
$ sudo iptables -L INPUT
Chain INPUT (policy ACCEPT)
target prot opt source destination
ACCEPT udp -- anywhere anywhere udp dpt:domain
ACCEPT tcp -- anywhere anywhere tcp dpt:domain
ACCEPT udp -- anywhere anywhere udp dpt:bootps
ACCEPT tcp -- anywhere anywhere tcp dpt:bootps
ACCEPT all -- anywhere anywhere ctstate RELATED,ESTABLISHED
ACCEPT all -- anywhere anywhere
INPUT_direct all -- anywhere anywhere
INPUT_ZONES_SOURCE all -- anywhere anywhere
INPUT_ZONES all -- anywhere anywhere
DROP all -- anywhere anywhere ctstate INVALID
REJECT all -- anywhere anywhere reject-with icmp-host-prohibited
ACCEPT udp -- anywhere anywhere udp spts:bootps:bootpc dpts:bootps:bootpc
ACCEPT tcp -- anywhere anywhere tcp dpt:http
So far, the selected ZTP containers are up and running ad we can start with the Mellanox SN 2010 switch.
Setting up the switch
#1. Wiring the management interface
The first step is, obviously, to connect the management interface (eth0) to the br0 switch so that ZTP process starts. We use a standard CAT.5e cable for such a connectivity and power up the switch:
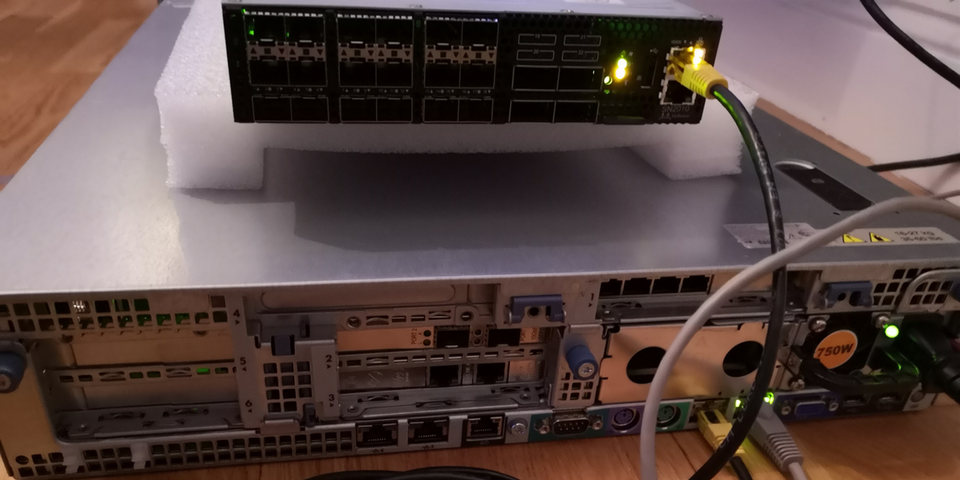
Be careful, the switch (as any other network devices) is noisy, especially during the boot process. Don’t launch it, if anybody sleeps in the flat.
#2. Booting the switch and following ZTP process
In parallel we start a simple ICMP check from the management host towards OOB interfaces of the switch:
2
3
4
5
6
7
8
9
10
11
12
13
14
15
16
17
18
19
PING 169.254.255.21 (169.254.255.21) 56(84) bytes of data.
From 169.254.255.1 icmp_seq=1 Destination Host Unreachable
From 169.254.255.1 icmp_seq=2 Destination Host Unreachable
...
64 bytes from 169.254.255.21: icmp_seq=85 ttl=64 time=0.491 ms
64 bytes from 169.254.255.21: icmp_seq=86 ttl=64 time=0.233 ms
...
From 169.254.255.1 icmp_seq=374 Destination Host Unreachable
From 169.254.255.1 icmp_seq=375 Destination Host Unreachable
...
64 bytes from 169.254.255.21: icmp_seq=446 ttl=64 time=0.165 ms
64 bytes from 169.254.255.21: icmp_seq=447 ttl=64 time=0.174 ms
...
From 169.254.255.1 icmp_seq=509 Destination Host Unreachable
From 169.254.255.1 icmp_seq=510 Destination Host Unreachable
...
64 bytes from 169.254.255.21: icmp_seq=877 ttl=64 time=0.231 ms
64 bytes from 169.254.255.21: icmp_seq=878 ttl=64 time=0.244 ms
When the switch starts responding to the ping, it means it has received IP address over DHCP and has booted for the first time. Following the logic of our ZTP script, the switch will download and install the proper SW, then reboot, than install license and reboot again. The overall process takes about 5-7 minutes. Therefore, the switch will be dropping out of the ICMP check and getting back several times.
When we are waiting for the switch to boot, we can check the logs in the DHCP container, showing the IP address being assigned to the switch:
2
3
4
5
DHCPDISCOVER from b8:59:9f:09:99:6c via br0
DHCPOFFER on 169.254.255.21 to b8:59:9f:09:99:6c via br0
DHCPREQUEST for 169.254.255.21 (169.254.255.1) from b8:59:9f:09:99:6c via br0
DHCPACK on 169.254.255.21 to b8:59:9f:09:99:6c via br0
After the ping begin successful for the 3rd time, we can SSH to the device:
2
3
4
5
6
7
8
9
10
11
12
13
14
15
16
17
The authenticity of host '169.254.255.21 (169.254.255.21)' can't be established.
ECDSA key fingerprint is SHA256:KybVhAGJxoTClVzoZt1H0eS6/uqXdxxmXYyYD3PIrjE.
ECDSA key fingerprint is MD5:4e:2c:09:9d:d0:75:44:80:4f:db:3b:75:8e:9b:41:8e.
Are you sure you want to continue connecting (yes/no)? yes
Warning: Permanently added '169.254.255.21' (ECDSA) to the list of known hosts.
cumulus@169.254.255.21's password:
Welcome to Cumulus (R) Linux (R)
For support and online technical documentation, visit
http://www.cumulusnetworks.com/support
The registered trademark Linux (R) is used pursuant to a sublicense from LMI,
the exclusive licensee of Linus Torvalds, owner of the mark on a world-wide
basis.
cumulus@mlx-cl:mgmt-vrf:~$
#3. Verification of the installed SW and License
At this point, we need to verify that our Mellanox SN 2010 has properly installed SW version:
2
3
4
DISTRIB_ID="Cumulus Linux"
DISTRIB_RELEASE=3.7.9
DISTRIB_DESCRIPTION="Cumulus Linux 3.7.9"
And license key:
2
3
[sudo] password for cumulus:
magic_user|magic_license
The installation of the license is very important. If it is not installed, the data plane ports on the switch will remain down.
#4. Bringing data plane interfaces up
Basically, the switch is already fully operational, we need just to configure and connect the data plane interfaces. The configuration is very simple:
2
3
4
5
6
7
8
9
10
11
12
13
14
15
16
17
18
19
20
21
22
23
24
25
26
27
28
29
30
31
32
33
34
35
--- /etc/network/interfaces 2019-08-07 20:00:02.722005157 +0000
+++ /run/nclu/ifupdown2/interfaces.tmp 2019-08-07 20:26:03.741154034 +0000
@@ -5,15 +5,21 @@
# The loopback network interface
auto lo
iface lo inet loopback
# The primary network interface
auto eth0
iface eth0 inet dhcp
vrf mgmt
+auto swp1
+iface swp1
+
+auto swp7
+iface swp7
+
auto mgmt
iface mgmt
address 127.0.0.1/8
vrf-table auto
net add/del commands since the last "net commit"
================================================
User Timestamp Command
------- -------------------------- ----------------------
cumulus 2019-08-07 20:25:49.304274 net add interface swp1
cumulus 2019-08-07 20:25:59.355388 net add interface swp7
After the commit is done, we plug the SFPs. If everything were done correct, the ports starts working:

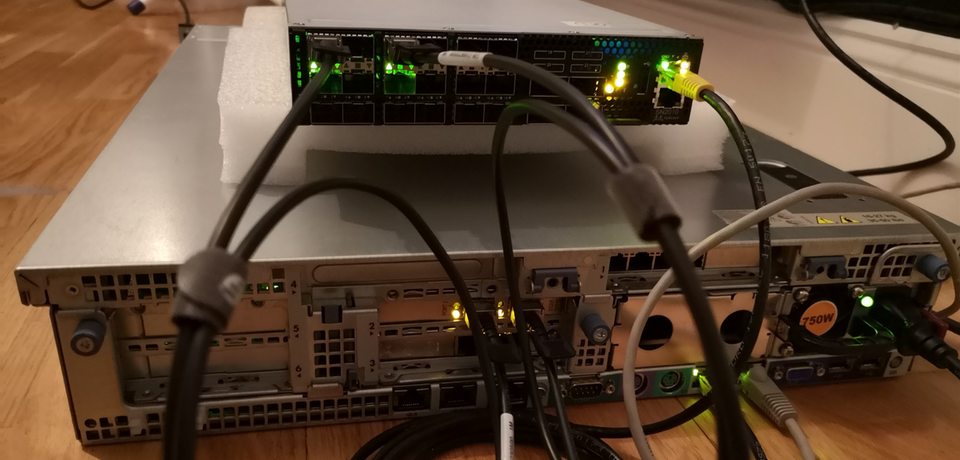
The lab is built, so we have now both fully provisioned Mellanox SN 2010 switch with Cumulus 3.7.9 up and running and HP server running the virtual lab.
#5. Final verification
In the next blogpost we will be connecting the VNFs with Cisco IOS XR and Nokia SR OS to this switch. To make sure, we connect them properly, we need to check that swp1 of the Mellanox SN 2010 is connected to br1 and swp7 to br2. The easiest way is to check the mac addresses. For the br1-sw1 connection:
Check switch:
2
3
3: swp1: <BROADCAST,MULTICAST,UP,LOWER_UP> mtu 1500 qdisc pfifo_fast state UP mode DEFAULT group default qlen 1000
link/ether b8:59:9f:62:46:ac brd ff:ff:ff:ff:ff:ff
Check server:
2
3
4
5
port no mac addr is local? ageing timer
1 b8:59:9f:62:46:ac no 24.20
1 e8:39:35:a5:5e:40 yes 0.00
1 e8:39:35:a5:5e:40 yes 0.00
The same steps are applied for the second pair of the interfaces.
We are ready to rock!

Lessons learned
Despite I have taken the ZTP script from the Cumulus webpage as a basis, I had to rework it significantly. The downside of such a process is that you can’t do it with the VM, as the VM has pre-installed SW from the Cumulus, therefore the ONIE process is not necessarily available.
As a advantage you have possibility to improve your Bash skills significantly, so keep practicing.
Conclusion
We have built the solid lab foundation in the article today for a couple of the further blogposts! I promise, some of the would be very interesting. Take care and goodbye!
Support us
P.S.
If you have further questions or you need help with your networks, I’m happy to assist you, just send me message (https://karneliuk.com/contact/). Also don’t forget to share the article on your social media, if you like it.
BR,
Anton Karneliuk