

Hello my friend,
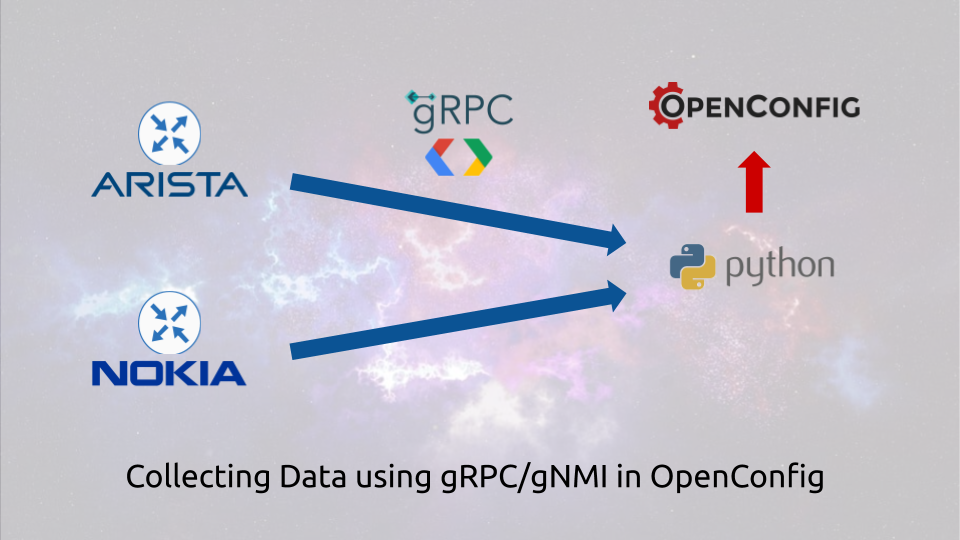
finally after some time we are writing again about the OpenConfig, Nokia SR OS and Arista EOS. This time we do that in the context of gNMI (gRPC network management interface). So, today you will learn how to collect the configuration and operational data from the network functions using gNMI. As usual, there will be a lot of Python, and a lot of fun.
2
3
4
5
retrieval system, or transmitted in any form or by any
means, electronic, mechanical or photocopying, recording,
or otherwise, for commercial purposes without the
prior permission of the author.
Start your network automation journey
Network automation is a must-have technology set in all the industries these days. A lot of companies are talking about it, some of them are practising NetDevOps and automation approached. And latter one create a huge positive difference in their business.
At this training we teach you all the necessary concepts such as YANG data modelling, working with all the most relevant data formats JSON/YAML/XML/Protobuf, Linux administration basics, programming in Bash/Ansible/Python for multiple network operation systems including Cisco IOS XR, Nokia SR OS, Arista EOS and Cumulus Linux. All the most useful technologies such as NETCONF, RESTCONF, REST API, gNMI, OpenConfig and many others. Don’t miss the opportunity to improve your career.
Brief description
gNMI is a protocol used to manage the network elements using the gRPC (general-purpose RPC). gRPC was crated back in the days by Google to interconnect their systems with the focus on the high-performance. The data format used in the gRPC is the Protobuf, which we covered in-depth in terms of message’s generation and message’s read. As such, the structure of the gRPC messages are covered by the specific Protobuf schemas, which will review later.
In the networking world, the gNMI stated getting into from the the steaming telemetry side. It is not surprisingly, as sending the data with the Protobuf encoding is way more efficient comparing to the others. After this interfaces was implemented, the vendors started assessing the further capabilities of the gRPC. Perhaps, it is possible not only to collect the data from the network functions, but also to configure the network elements. That’s how the gRPC mutated into gNMI with the possibility to do all the things, what the NETCONF or RESTCONF can do. It is never ending process and desire to find a single solution, what matches all the operational needs.
Interested in the real usage of gNMI? Want to be able to manage your network elements using it? Join our network automation training and master your data format knowledge.
What are we going to test?
We are starting from our GitHub repository, where we have Protobuf-related Python scripts. However, our focus today is gRPC, so we are going to:
- Understand how to use the gNMI interface.
- Collect the operational data and configuration from the Nokia SR OS and Arista EOS using gRPC based on the gNMI specification.
- Parse collected data to convert into a Python dictionary
Software version
Our setup is still Python-centric as described in the Code EXpress (CEX) series. However, we add the virtual network functions back into the game. Hence, In today articles we use the following toolkit:
- Python 3.7.6
- Protobuf 3.11.4
- VS Code 1.45.0
- gRPC 1.29.0
- [guest VNF] Arista EOS 4.24.0
- [guest VNF] Nokia SR OS 20.5.R1
Network automation development has lots of tools and technologies. We help you navigate across these dark waters and get to the light of the truly automated systems.
Topology
As we focus on gNMI/gRPC itself, we need to make sure that we can reach the network functions from our automation development host. As such, the following topology is used in the current lab:
2
3
4
5
6
7
8
9
10
11
12
13
14
15
16
17
18
19
20
21
22
23
24
25
| |
| +-------------------+ |
| | | |
| | Developers Host | |
| | | |
| +--------+----------+ |
| | br0: |
| | 192.168.100.1/24 |
| | |
| | |
| +--------+----------+ |
| | | |
| | | |
| | Management1 | bof: |
| | 192.168.100.52/24 | 192.168.100.64/24 |
| +-----+-----+ +------+------+ |
| | | | | |
| | EOS4240 | | SR205R1 | |
| | | | | |
| +-----------+ +-------------+ |
| |
| (c) 2020, karneliuk.com // gNMI Lab |
| |
+-----------------------------------------------------+
Solution development
In order, to create a Python tool, which collects the information from the network elements using the gNMI/gRPC, we need to accomplish the following tasks:
- install the gRPC package for Python;
- get the gNMI Protobuf schemas (.proto files) and generate the Python meta classes for them;
- create a Python script, which connects to the devices using the gRPC and grab the necessary information;
- parse the collected information and convert it into a Python dictionary.
Previous article give great overview of the Protobuf schemas (.proto files) as well as how to work with them properly in Python. That overview is important in the success of the todays article, as will some ready Protobuf schemas; hence, you need to know how to read and deal it with that.
#1. Installation of the gRPC
gRPC, as a general-purpose RPC framework, has a dedicated website. This website contains a lot of user guides and tutorials including the one for Python. Per this guide, we need the two packages: grpcio and grpcio-tools. We do this modifying the requirements.txt file we use in our project and running the insulation via pip:
2
3
4
5
6
7
8
9
10
11
12
13
14
15
16
17
grpcio
grpcio-tools
$ pip install -r requirements.txt
Collecting grpcio
Using cached grpcio-1.29.0-cp38-cp38-manylinux2010_x86_64.whl (3.0 MB)
Collecting grpcio-tools
Using cached grpcio_tools-1.29.0-cp38-cp38-manylinux2010_x86_64.whl (2.4 MB)
Collecting six>=1.5.2
Using cached six-1.15.0-py2.py3-none-any.whl (10 kB)
Collecting protobuf>=3.5.0.post1
Using cached protobuf-3.12.1-cp38-cp38-manylinux1_x86_64.whl (1.3 MB)
Requirement already satisfied: setuptools in ./venv/lib/python3.8/site-packages (from protobuf>=3.5.0.post1->grpcio-tools->-r requirements.txt (line 2)) (41.2.0)
Installing collected packages: six, grpcio, protobuf, grpcio-tools
Successfully installed grpcio-1.29.0 grpcio-tools-1.29.0 protobuf-3.12.1 six-1.15.0
We do that in the Python virtual environment. Join our network automation training to learn more about it.
Once these modules are installed, we can use them in our scripts. On a side note, you see that the protobuf is inherently installed as a dependency of the grpcio-tools.
#2. Using gNMI Protobuf schemas
In the previous example we have create the Protobuf schema (.proto file) for the OpenConfig YANG module openconfig-interfaces manually, despite the were already some realisation. You remember, that those files describes the structure of the messages. In case of the gNMI, all the Protobuf schemas are already created, as they describe what are them messages, which are used by the gNMI over gRPC to manage the network elements. So, we clone the gNMI specification from the OpenConfig repository at GitHub:
2
3
4
5
6
7
8
Cloning into 'gnmi'...
remote: Enumerating objects: 9, done.
remote: Counting objects: 100% (9/9), done.
remote: Compressing objects: 100% (9/9), done.
remote: Total 1337 (delta 1), reused 4 (delta 0), pack-reused 1328
Receiving objects: 100% (1337/1337), 594.09 KiB | 972.00 KiB/s, done.
Resolving deltas: 100% (649/649), done.
Once the specification is downloaded, we take a look on what we do have there. Let’s take a look at two the most important folders, from the perspective of this blogpost:
2
3
4
5
6
gnmi_pb2_grpc.py gnmi_pb2.py gnmi.pb.go gnmi.proto
$ ls gnmi/proto/gnmi_ext/
gnmi_ext_pb2_grpc.py gnmi_ext_pb2.py gnmi_ext.pb.go gnmi_ext.proto
We can see that the Python meta classes are already generated. In the same time, we see only a single Protobuf schema in each folder, whereas there are two Python files. Hence, we take the following course of action:
- copy the ready Python classes for the missing .proto files
- copy the .proto files, which are exist, and convert them into the Python classes on our own.
You can do the first step without any issue:
2
$ cp gnmi/proto/gnmi/gnmi_pb2_grpc.py bin/.
The second also looks fine in the beginning:
2
3
$ cp gnmi/proto/gnmi/gnmi.proto bin/.
$ cd bin
Now we need to convert the Protobuf schemas in the Python classes. This time we use the Protobuf installed together with grpcio-tools as a Python module. The file with extensions is converted without issues:
However, the file describing the gNMI messages is a tough one:
2
3
4
5
6
7
8
9
10
11
github.com/openconfig/gnmi/proto/gnmi_ext/gnmi_ext.proto: File not found.
gnmi.proto:20:1: Import "github.com/openconfig/gnmi/proto/gnmi_ext/gnmi_ext.proto" was not found or had errors.
gnmi.proto:216:12: "gnmi_ext.Extension" is not defined.
gnmi.proto:243:12: "gnmi_ext.Extension" is not defined.
gnmi.proto:346:12: "gnmi_ext.Extension" is not defined.
gnmi.proto:365:12: "gnmi_ext.Extension" is not defined.
gnmi.proto:413:12: "gnmi_ext.Extension" is not defined.
gnmi.proto:425:12: "gnmi_ext.Extension" is not defined.
gnmi.proto:434:12: "gnmi_ext.Extension" is not defined.
gnmi.proto:446:12: "gnmi_ext.Extension" is not defined.
The explanation though says, that it tries to look for the gnmi_ext.proto file on the web, and if you would try to open that link, it doesn’t work indeed. So we are going to modify the gnmi.proto file to point it to the local one:
2
3
4
5
6
7
8
9
10
11
12
13
14
15
16
17
18
19
20
21
22
23
24
//
// Copyright 2016 Google Inc. All Rights Reserved.
//
// Licensed under the Apache License, Version 2.0 (the "License");
// you may not use this file except in compliance with the License.
// You may obtain a copy of the License at
//
// http://www.apache.org/licenses/LICENSE-2.0
//
// Unless required by applicable law or agreed to in writing, software
// distributed under the License is distributed on an "AS IS" BASIS,
// WITHOUT WARRANTIES OR CONDITIONS OF ANY KIND, either express or implied.
// See the License for the specific language governing permissions and
// limitations under the License.
//
syntax = "proto3";
import "google/protobuf/any.proto";
import "google/protobuf/descriptor.proto";
// import "github.com/openconfig/gnmi/proto/gnmi_ext/gnmi_ext.proto"; // Commenting the original link
import "gnmi_ext.proto";
!
! FURTHER OUTPUT IS TRUNCATED FOR BREVITY
Take a look on the last two strings: that is exactly what we have modified.
Now we perform the second attempt to create the Python file with the meta classes:
This time it is successful and we can go ahead with the creation of the Python script itself.
#3. Creating Python 3 code to collect the data via gRPC
We start the creating of our Python code with the import of the installed grpcio package and the created meta classes:
2
3
4
5
6
7
#!/usr/bin/env python
# Modules
import grpc
from bin.gnmi_pb2_grpc import *
from bin.gnmi_pb2 import *
Some gut feeling advised us that we shall try to execute the script now, without writing the code further:
2
3
4
5
6
7
Traceback (most recent call last):
File "act_gnmi.py", line 5, in <module>
from bin.gnmi_pb2_grpc import *
File "/home/aaa/Dev/grpc_demo/bin/gnmi_pb2_grpc.py", line 4, in <module>
from proto.gnmi import gnmi_pb2 as proto_dot_gnmi_dot_gnmi__pb2
ModuleNotFoundError: No module named 'proto'
And immideately we got an error that the Python class gnmi_pb2_grpc.py, which we have just copied, trying to import another from non-existent path. That required fixing:
2
3
4
5
6
# Generated by the gRPC Python protocol compiler plugin. DO NOT EDIT!
import grpc
# from proto.gnmi import gnmi_pb2 as proto_dot_gnmi_dot_gnmi__pb2
import bin.gnmi_pb2 as proto_dot_gnmi_dot_gnmi__pb2
Despite we are asked not to edit that, we have to, as our project has a different project structure comparing to the one, which the gnmi GitHub has. Our folder structure is the following:
2
3
4
5
6
+--bin
+--gnmi_ext_pb2_grpc.py
+--gnmi_ext_pb2.py
+--gnmi_pb2_grpc.py
+--gnmi_pb2.py
Finally, by executing the Python script several more times and getting the similar errors, we clean the path and interconnections between all the Python meta classes.
Don’t worry, in our GitHub project we put all the properly modified files, which you can use.
Once the we launch ur script without the issues, we go with our script further. We’ll take a look in collecting the information about the interfaces, but later will show how to collect the other information as well. As such, we create a path, what we want to poll, and defined the devices, which we are going to collect the information from:
2
3
4
5
6
7
8
9
10
11
12
13
14
15
16
17
#!/usr/bin/env python
!
! SOME OUTPUT IS TRUNCATED FOR BREVITY
!
# Variables
info_to_collect = ['openconfig-interfaces:interfaces']
target_devices = [
{
'ip_address': '192.168.100.62',
'port': 6030,
'username': 'aaa',
'password': 'aaa'
}
]
!
! FURTHER OUTPUT IS TRUNCATED FOR BREVITY
Both info_to_collect and target_devices are Python lists, which contain the information “what to collect” and “from whom to collect“. The info_to_collect contains the path to a certain resource:
- Full path is yang-module-name:top-level-container/next-level-container[key=value].
- The path could be only partially provided such as yang-module-name:top-level-container/next-level-container or yang-module-name:top-level-container or even yang-module-name.
To implement this logic you can create the following user-defined function:
2
3
4
5
6
7
8
9
10
11
12
13
14
15
16
17
18
19
20
21
22
23
24
25
26
27
28
29
#!/usr/bin/env python
!
! SOME OUTPUT IS TRUNCATED FOR BREVITY
!
# User-defined functions
def gnmi_path_generator(path_in_question):
gnmi_path = Path()
path_elements = path_in_question.split('/')
print(path_elements)
for pe_entry in path_elements:
if not re.match('.+?:.+?', pe_entry) and len(path_elements) == 1:
sys.exit(f'You haven\'t specified either YANG module or the top-level container in \'{pe_entry}\'.')
elif re.match('.+?:.+?', pe_entry):
gnmi_path.origin = pe_entry.split(':')[0]
gnmi_path.elem.add(name=pe_entry.split(':')[1])
elif re.match('.+?\[.+?\]', pe_entry):
gnmi_path.elem.add(name=pe_entry.split('[')[0], key={f'{pe_entry.split("[")[1].split("=")[0]}': f'{re.sub("]", "", pe_entry.split("[")[1].split("=")[1])}'})
else:
gnmi_path.elem.add(name=pe_entry)
return gnmi_path
!
! FURTHER OUTPUT IS TRUNCATED FOR BREVITY
The function intends to create the object using the Path message out of the gnmi.proto file:
2
3
4
5
6
7
8
9
10
11
12
13
14
15
16
17
18
19
20
21
22
23
24
25
26
27
28
29
30
31
!
! SOME OUTPUT IS TRUNCATED FOR BREVITY
!
// Path encodes a data tree path as a series of repeated strings, with
// each element of the path representing a data tree node name and the
// associated attributes.
// Reference: gNMI Specification Section 2.2.2.
message Path {
// Elements of the path are no longer encoded as a string, but rather within
// the elem field as a PathElem message.
repeated string element = 1 [deprecated=true];
string origin = 2; // Label to disambiguate path.
repeated PathElem elem = 3; // Elements of the path.
string target = 4; // The name of the target
// (Sec. 2.2.2.1)
}
// PathElem encodes an element of a gNMI path, along with any attributes (keys)
// that may be associated with it.
// Reference: gNMI Specification Section 2.2.2.
message PathElem {
string name = 1; // The name of the element in the path.
map<string, string> key = 2; // Map of key (attribute) name to value.
}
// Value encodes a data tree node's value - along with the way in which
// the value is encoded. This message is deprecated by gNMI 0.3.0.
// Reference: gNMI Specification Section 2.2.3.
!
! FURTHER OUTPUT IS TRUNCATED FOR BREVITY
The previous article explain how to populate the object in Python for a Protobuf scheme.
The final piece of the code, though the most complex, is to collect the data from the network function using gRPC transport with gNMI specification:
2
3
4
5
6
7
8
9
10
11
12
13
14
15
16
17
18
19
20
21
22
#!/usr/bin/env python
!
! SOME OUTPUT IS TRUNCATED FOR BREVITY
!
# Body
if __name__ == '__main__':
for td_entry in target_devices:
metadata = [('username', td_entry['username']), ('password', td_entry['password'])]
grpc_connection = grpc.insecure_channel(f'{td_entry["ip_address"]}:{td_entry["port"]}', metadata)
grpc.channel_ready_future(grpc_connection).result(timeout=5)
gnmi_interface = gNMIStub(grpc_connection)
for itc_entry in info_to_collect:
intent_path = gnmi_path_generator(itc_entry)
gnmi_message_request = GetRequest(path=[intent_path], type=0, encoding=4)
gnmi_message_response = collected_data = gnmi_interface.Get(gnmi_message_request, metadata=metadata)
print(gnmi_message_response)
The script is very easy if you understand the gRPC and gNMI and very difficult, if you don’t. In a nutshell, this script:
- creates a pooling from all the devices provided in the target_devices list using the for-loop;
- the variable metadata is created as it stores the credentials to authenticate to the device;
- the insecure_channel is established towards the target device with the timeout 5 seconds. The “insecure” means that there is no SSL encryption for that. Alternatively, you can establish secure_channel, but that would require the SSL certificate to pass the validation. There is no option to bypass the certificate check; hence, there is a problem if you are using the self-signed certificates and want to manage the devices. In a future blogposts we will cover how you can deploy the secure_channel;
- the gNMI interface is instantiated over the gRPC channel using the gNMIStub() class;
- for each resource, which we want to collect the information from, we generate the gNMI path using the function gnmi_path_generator we have created earlier;
- the GetRequest() Protobuf message, the gNMI request us prepared and collected using the Get() Protobuf message. Pay attention that upon the Get() request you need to provide the authentication metadata as well.
Let’s pay some attention to the GetRequest message by looking in the original Protobuf schema:
2
3
4
5
6
7
8
9
10
11
12
13
14
15
16
17
18
19
20
21
22
23
24
25
26
27
28
29
30
31
32
33
34
35
36
37
38
39
40
41
42
43
44
45
!
! SOME OUTPUT IS TRUNCATED FOR BREVITY
!
// Encoding defines the value encoding formats that are supported by the gNMI
// protocol. These encodings are used by both the client (when sending Set
// messages to modify the state of the target) and the target when serializing
// data to be returned to the client (in both Subscribe and Get RPCs).
// Reference: gNMI Specification Section 2.3
enum Encoding {
JSON = 0; // JSON encoded text.
BYTES = 1; // Arbitrarily encoded bytes.
PROTO = 2; // Encoded according to out-of-band agreed Protobuf.
ASCII = 3; // ASCII text of an out-of-band agreed format.
JSON_IETF = 4; // JSON encoded text as per RFC7951.
}
!
! SOME OUTPUT IS TRUNCATED FOR BREVITY
!
// GetRequest is sent when a client initiates a Get RPC. It is used to specify
// the set of data elements for which the target should return a snapshot of
// data. The use_models field specifies the set of schema modules that are to
// be used by the target - where use_models is not specified then the target
// must use all schema models that it has.
// Reference: gNMI Specification Section 3.3.1
message GetRequest {
Path prefix = 1; // Prefix used for paths.
repeated Path path = 2; // Paths requested by the client.
// Type of elements within the data tree.
enum DataType {
ALL = 0; // All data elements.
CONFIG = 1; // Config (rw) only elements.
STATE = 2; // State (ro) only elements.
// Data elements marked in the schema as operational. This refers to data
// elements whose value relates to the state of processes or interactions
// running on the device.
OPERATIONAL = 3;
}
DataType type = 3; // The type of data being requested.
Encoding encoding = 5; // Encoding to be used.
repeated ModelData use_models = 6; // The schema models to be used.
// Extension messages associated with the GetRequest. See the
// gNMI extension specification for further definition.
repeated gnmi_ext.Extension extension = 7;
}
Out of this snippet you may figure out that in the code we have used the JSON encoding (encoding=0) and we want to collect all the information (type=0).
So far the script is almost finished. We are missing only the parsing of the collected output into a Python dictionary. We will do that once we will verify that we indeed can grab the data via gRPC transport in gNMI specification.
Building the gNMI/gRPC connectivity
Now it is time to verify, whether our Python script is working properly. In order to show the capability of the gRPC transport, gNMI specification and vendor-agnostic OpenConfig YANG, we do that with the two different network functions: Arista vEOS and Nokia VSR.
#1. Collecting the data in OpenConfig YANG modules from Arista EOS
Arista EOS has a support of gNMI since a while. In their official documentation they explain how to configure it; hence, we follow feta guide to create a configuration on our EOS4240:
2
3
4
5
6
EOS4240(config)#management api gnmi
EOS4240(config-mgmt-api-gnmi)#transport grpc def
EOS4240(config-gnmi-transport-def)#no shut
EOS4240(config-gnmi-transport-def)#exit
EOS4240#
Once the configuration is done, we can verify, whether it acts properly:
2
3
4
5
Enabled: Yes
Server: running on port 6030, in default VRF
SSL Profile: none
QoS DSCP: none
In the snippet above you, that by default in Arista the gRPC is running over the port TCP/6030. As we have created the insecure_channel earlier, we don’t have to add the certificate. That means, however, that the communication between the automation host and Arista EOS network function is not encrypted. That is OK for the lab, but it is definitely not OK for the production.
Once the gNMI is enabled at EOS, we can run our Python script to collect the data:
2
3
4
5
6
7
8
9
10
11
12
13
Collecting the openconfig-interfaces:interfaces data from 192.168.100.62 over gNMI...
notification {
update {
path {
elem {
name: "interfaces"
}
}
val {
json_ietf_val: "{"openconfig-interfaces:interface": [{"config": {"description": "", "enabled": true, "arista-intf-augments:load-interval": 300, "loopback-mode": false, "mtu": 0, "name": "Ethernet1", "openconfig-vlan:tpid": "openconfig-vlan-types:TPID_0X8100", "type": "iana-if-type:ethernetCsmacd"}, "openconfig-if-ethernet:ethernet": {"config": {"arista-intf-augments:fec-encoding": {"disabled": false, "fire-code": false, "reed-solomon": false, "reed-solomon544": false}, "openconfig-hercules-interfaces:forwarding-viable": true, "mac-address": "00:00:00:00:00:00",
!
! FURTHER OUTPUT IS TRUNCATED FOR BREVITY
You can see the output in the Protobuf format, which is absolutely fantastic. It means, that the our Python script is properly collecting the information from the Arista EOS network function using the gRPC transport with gNMI specification in OpenConfig YANG model. You might see the previous sentence as a pure SEO, but that is indeed what we have achieved. So Arista is working fine and we can try to collect the information from the next network function.
At our network automation training we explain how to automate Arista EOS network functions using gNMI, NETCONF, RESTCONF and CLI.
#2. Collecting the data in OpenConfig YANG modules from Nokia SR OS
Nokia also has some documentation explaining how to prepare the device to with gNMI, so we took those details and extend them with OpenConfig YANG modules:
2
3
4
5
6
7
8
9
10
11
12
13
14
15
16
17
18
19
20
21
22
23
24
25
26
27
28
29
30
31
32
33
34
35
36
37
38
39
40
41
42
43
44
45
46
47
48
49
50
51
52
53
A:admin@SR205R1# info
system {
grpc {
admin-state enable
allow-unsecure-connection
gnmi {
admin-state enable
auto-config-save true
}
rib-api {
admin-state enable
}
}
management-interface {
yang-modules {
openconfig-modules true
}
}
security {
aaa {
local-profiles {
profile "administrative" {
default-action permit-all
grpc {
rpc-authorization {
gnmi-capabilities permit
gnmi-get permit
gnmi-set permit
gnmi-subscribe permit
rib-api-getversion permit
rib-api-modify permit
}
}
}
}
}
user-params {
local-user {
user "admin" {
password "$2y$10$TQrZlpBDra86.qoexZUzQeBXDY1FcdDhGWdD9lLxMuFyPVSm0OGy6"
access {
console true
grpc true
}
console {
member ["administrative"]
}
}
}
}
}
}
One the configuration is done, we can verify, whether it is properly applied at Nokia SR OS network function:
2
3
4
5
6
7
8
9
10
11
12
13
14
15
16
===============================================================================
gRPC Server
===============================================================================
Administrative State : Enabled
Operational State : Up
Supported services Version Admin State
-------------------------------------------------------------------------------
gNMI 0.7.0 Enabled
gNOI CertificateManagement 0.1.0 Disabled
gNOI System 1.0.0 Disabled
mdCli 0.1.0 Disabled
RibApi 1.1.0 Enabled
===============================================================================
Nokia has a different the port for the gRPC transport comparing to Arista. For Nokia SR OS it is TCP/57400 and, per documentation, it is not configurable. So, we modify the variables in our script in the following way:
2
3
4
5
6
7
8
9
10
11
12
13
14
15
16
17
18
19
20
21
22
23
#!/usr/bin/env python
!
! SOME OUTPUT IS TRUNCATED FOR BREVITY
!
# Variables
info_to_collect = ['openconfig-interfaces:interfaces']
target_devices = [
{
'ip_address': '192.168.100.64',
'port': 57400,
'username': 'admin',
'password': 'admin'
},
{
'ip_address': '192.168.100.62',
'port': 6030,
'username': 'aaa',
'password': 'aaa'
}
]
!
! FURTHER OUTPUT IS TRUNCATED FOR BREVITY
Now, finger cross, we can get the data from Nokia SR OS network function:
2
3
4
5
6
7
8
9
10
11
12
13
Collecting the openconfig-interfaces:interfaces data from 192.168.100.64 over gNMI...
notification {
timestamp: 1590345185604956639
update {
path {
elem {
name: "interfaces"
}
}
val {
json_val: "{\n "interface": [\n {\n "name": "1/1/c1/1",\n "config": {\n "name": "1/1/c1/1",\n "type": "ethernetCsmacd",\n "enabled": true\n },\n "state": {\n "name": "1/1/c1/1",\n "type": "ethernetCsmacd",\n "mtu": 9212,\n "description": "10-Gig Ethernet",\n "enabled": true,\n "ifindex": 1610899521,\n "admin-status": "UP",\n "oper-status": "UP",\n "last-change": "1860460000",\n "counters": {\n "in-octets": "0",\n "in-unicast-pkts": "0",\n "in-broadcast-pkts": "0",\n "in-multicast-pkts": "0",\n "in-discards": "0",\n "in-errors": "0",\n "in-unknown-protos": "0",\n "in-fcs-errors": !
! FURTHER OUTPUT IS TRUNCATED FOR BREVITY
Hurray! Using the Python code, without any modification we were able to collect the configuration and operational data in OpenConfig YANG model using the gRPC transport with the gNMI specification. Isn’t that beautiful?
At our network automation training we explain how to automate Nokia SR OS network functions using gNMI, NETCONF and CLI.
Parsing the received gNMI Protobuf message
The last step in the today’s lab is to convert the collected data out of the Protobuf into a Python dictionary, so that you can use it further in your application.
In the previous article we have explained, how to read the Protobuf messages using the Python. So, today, we reuse that approach, as we need to get only a val. On top of that, we covert the JSON-string in a Python dictionary using the built-in json package:
2
3
4
5
6
7
8
9
10
11
12
13
14
15
16
17
18
19
20
21
22
23
24
25
26
27
28
29
30
31
32
33
34
35
36
37
38
#!/usr/bin/env python
# Modules
import grpc
from bin.gnmi_pb2_grpc import *
from bin.gnmi_pb2 import *
import re
import sys
import json
!
! SOME OUTPUT IS TRUNCATED FOR BREVITY
!
# Body
if __name__ == '__main__':
for td_entry in target_devices:
metadata = [('username', td_entry['username']), ('password', td_entry['password'])]
grpc_connection = grpc.insecure_channel(f'{td_entry["ip_address"]}:{td_entry["port"]}', metadata)
grpc.channel_ready_future(grpc_connection).result(timeout=5)
gnmi_interface = gNMIStub(grpc_connection)
for itc_entry in info_to_collect:
print(f'Collecting the {itc_entry} data from {td_entry["ip_address"]} over gNMI...\n\n')
intent_path = gnmi_path_generator(itc_entry)
gnmi_message_request = GetRequest(path=[intent_path], type=0, encoding=0)
gnmi_message_response = collected_data = gnmi_interface.Get(gnmi_message_request, metadata=metadata)
print(gnmi_message_response)
print(f'Getting OpenConfig YANG data out of the received Protobuf and coverting it into JSON...\n\n')
result_dict = {}
result_dict[itc_entry] = json.loads(gnmi_message_response.notification[0].update[0].val.json_ietf_val)
print(result_dict)
The last 4 strings, two of which are just the print() function, are covering the mentioned conversion. To be precise:
- The empty Python dictionary result_dict is created.
- Using the loads() function of the built-in json package, the byte-string of the Protobuf message at path .notification[0].update[0].val.json_ietf_val is converted to a Python dictionary.
The final result of the execution of the created Python script is:
2
3
4
5
6
7
8
9
10
11
Collecting the openconfig-interfaces:interfaces data from 192.168.100.62 over gNMI...
!
! SOME OUTPUT IS TRUNCATED FOR BREVITY
!
Getting OpenConfig YANG data out of the received Protobuf and coverting it into JSON...
{'openconfig-interfaces:interfaces': {'openconfig-interfaces:interface': [{'config': {'description': '', 'enabled': True, 'arista-intf-augments:load-interval': 300, 'loopback-mode': False, 'mtu': 0, 'name': 'Ethernet1', 'openconfig-vlan:tpid': 'openconfig-vlan-types:TPID_0X8100', 'type': 'iana-if-type:ethernetCsmacd'}, 'openconfig-if-ethernet:ethernet': {'config': {'arista-intf-augments:fec-encoding': {'disabled': False, 'fire-code': False, 'reed-solomon': False, 'reed-solomon544': False}, 'openconfig-hercules-interfaces:forwarding-viable': True, 'mac-address': '00:00:00:00:00:00',
!
! FURTHER OUTPUT IS TRUNCATED FOR BREVITY
The execution’s result tells us that the dictionary is creates successfully; hence, you can use it further in the script (e.g. storing them locally, sending them over REST API, writing to InfluxDB and so on).
GitHub repository
Our GitHub repository is updated per the latest status of this project. So, you can clone it and test the gNMI yourself.


Lessons learned
The first point, despite it seems very obvious, is imporant. As we have started with the Protobuf and spent a lot of time understanding how to deal with the Protobuf schemas and their Python implementation for writing and reading messages, we were able to resolve the Path issue needed for the gNMI. In our network automation training we take the same approach: we provide the knowledge of the network automation layer by layer, so that each new knowledge set relies on the previous.
The second observation is less obvious, but is also very important. We originally tested the script with the Arista EOS, so it supported the JSON_IETF encoding. Once we started using it with Nokia SR OS, we have to change it JSON, as Nokia doesn’t support JSON_IETF. We believe that the reason is the version of the gNMI specification. Per the output from the Nokia SR OS, it has gNMI 0.7.0, so not sure if that is a bug or an intended behaviour.
Conclusion
The gNMI is way more complex comparing to the NETCONF or RESTCONF, as it requires an understanding of the new data encoding Protobuf, call flow and transport structure. However, with us you will gradually learn how to do that. Take care and good bye.
Support us
P.S.
If you have further questions or you need help with your networks, I’m happy to assist you, just send me message. Also don’t forget to share the article on your social media, if you like it.
BR,
Anton Karneliuk