

Hello my friend,
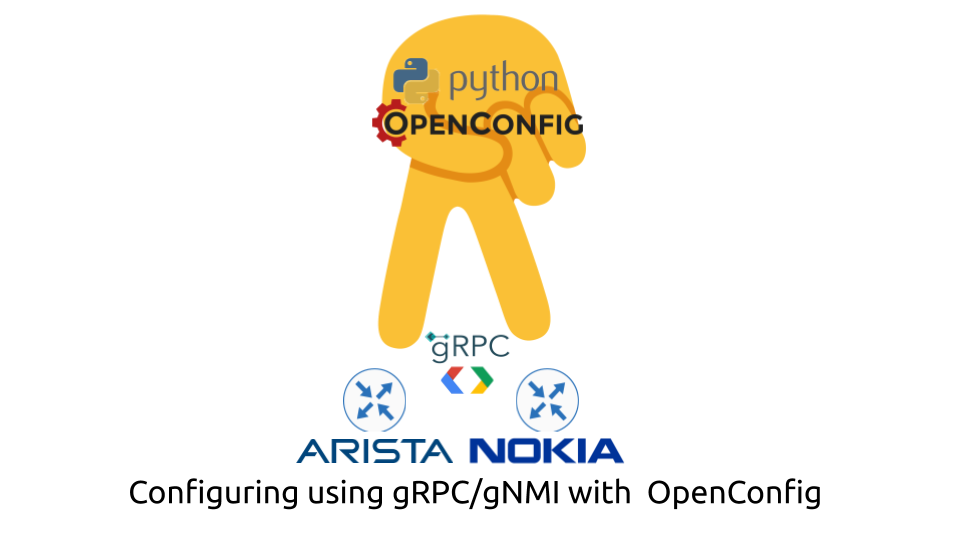
We have received a lot of positive feedbacks in the social media regarding our previous post about collecting info from Nokia SR OS and Arista EOS using gRPC/gNMI. Thank you! Today we will cover the configuration part; hence, you will learn how to configure Arista EOS and Nokia SR OS using the gRPC transport with gNMI specification and OpenConfig YANG modules.
2
3
4
5
retrieval system, or transmitted in any form or by any
means, electronic, mechanical or photocopying, recording,
or otherwise, for commercial purposes without the
prior permission of the author.
Start your network automation journey
Just in two weeks we start the new network automation training! This time we have ever biggest agenda with all the cutting edge technologies (NETCONF, REST API, gNMI), data models (YANG, Protobuf, JSON, XML, YAML), vendors (Cisco, Nokia, Arista, Cumulus) and a lot of programming (Ansible, Python, Bash) salted with Linux administration, virtualisation, containerisation and many more
In one place you will learn all the technologies and tolls you need to start or improve your career in the world of the future networks. Because the automation is the future of networking, and the future of IT in general. . Don’t miss the opportunity to improve your career.
Brief description
In the previous blogpost we have covered the general overview of the gNMI, so refer to it if you need more details. In short words, the gNMI is a specification (set of messages in Protobuf format and calls) using the gRPC transport. gRPC is an open source framework, based on the HTTP/2. By it looks, it is one of the most rapidly development technology to communicate between the network elements in the high-loaded high-scale systems. Therefore, it is perfectly fitting to the network management as well.
In the previous blogpost you have seen the GetRequest message and Get operation, as they are used to collect the data on request (don’t mix with streaming telemetry). As we want to configure the network functions, we need another set of message/operation. Thus, today you will see, how to use:
- SetRequest message
- Set operation
Want to learn more about integration of the gNMI with other components of the network automation pipeline? Join our network automation training and we will lead you there.
What are we going to test?
In the previous blogpost we have modified the GitHub repository, where we have added the components to work with the gNMI get. Today we are going to extend it and focus on:
- Modifying of the device configuration using the gNMI specification an gRPC transport.
- Modelling of the device configuration using the OpenConfig YANG.
- Convert a Python dictionary into a byte encoded JSON string
Software version
Python is one of the key programming language in the network automation world. Hence, we continue using the setup described the Code EXpress (CEX) series. In fact, the lab is not changed since the last week, so we have:
- Python 3.7.6 (and 3.8.2)
- Protobuf 3.11.4
- VS Code 1.45.0
- gRPC 1.29.0
- [guest VNF] Arista EOS 4.24.0
- [guest VNF] Nokia SR OS 20.5.R1
Network automation gives you endless opportunities to choose effective tools and ways of doing things. We help you to find the most effective one in your context.
Topology
We continue using the network automation topology :
2
3
4
5
6
7
8
9
10
11
12
13
14
15
16
17
18
19
20
21
22
23
24
25
26
27
28
| |
| +-------------------+ |
| | | |
| | Developers Host | |
| | | |
| +--------+----------+ |
| | br0: |
| | 192.168.100.1/24 |
| | |
| | |
| +---------------------+-------------------+ |
| | | |
| | | |
| | Management1 | bof: |
| | 192.168.100.62/24 | 192.168.100.64/24 |
| +-----+-----+ +------+------+ |
| | | Eth1 1/1/c1/1 | | |
| | EOS4240 +----------------------------+ SR205R1 | |
| | | .0 10.0.0.0/31 .1 | | |
| +-----+-----+ +------+------+ |
| | Lo0 | system |
| | 10.0.255.1/32 | 10.0.255.2/32 |
| +-+-+ +-+-+ |
| |
| (c) 2020, karneliuk.com // gNMI/Protobuf Lab |
| |
+---------------------------------------------------------------------------+
Solution development
We continue creating the set of Python tools to manage the network functions using the gRPC transport with gNMI specification and today you will see the development of the following tasks:
- Restructure of the variables to make the solution scalable and writing them in JSON format using the OpenConfig YANG modules.
- Parsing the JSON format and converting it in a Python dictionary.
- Configuration of the network functions using the gNMI specification over gRPC transport.
Let’s get started!
#1. Restructuring of the variables
In the previous blogpost, where we covered the Get operation using the gRPC/gNMI, we haven’t used the variables that much. In fact we have only two variables:
- The Python list with dictionaries containing the data how to access the host.
- The basic Python list containing the paths to resources, we want to request the information from.
As today we intend to do the configuration of the network functions, we need to have a more robust structure, which on the one hand can contain also the configuration port, and still can be used for data polling in the previous script. To achieve that, we will create the following structure of folders on top of the existing one:
2
3
4
5
6
7
+--get_gnmy.py
+--inventory
+--inventory.py
+--network_functions
+--EOS4240.json
+--SR205R1.json
The general idea is the following:
- the directory inventory is a home for all the inventory data;
- the file inventory.py contains the access data for the network functions (e.g. hostname, IP address, password, username;
- the sub directory network_functions stores the per device data needed for gRPC/gNMI operation;
- the files in a format {{hostname}}.json contains the paths and the associated configurational data.
Let’s take a look at the content of the inventory.py:
2
3
4
5
6
7
8
9
10
11
12
{
"network_functions": [
{
"hostname": "EOS4240",
"ip_address": "192.168.100.62",
"port": 6030,
"username": "aaa",
"password": "aaa"
}
]
}
Almost the same data set was used in the previous blogpost. However, this time it is encoded in the JSON format and put in a separate file. In terms of data, which is necessary for the configuration, we have the following (only part of the file is shown for brevity):
2
3
4
5
6
7
8
9
10
11
12
13
14
15
16
17
{
"intent_config": [
{
"path": "openconfig-interfaces:interfaces/interface[name=Ethernet1]",
"data": {
"name": "Ethernet1",
"config": {
"name": "Ethernet1",
"enabled": true,
"type": "iana-if-type:ethernetCsmacd",
"description": "Test IF 1"
}
}
}
]
}
This file has also JSON encoding and have the following format:
- The top-level element is intent_config, which is a Python list by itself and stores all the data we want to configure.
- The elements of this list are Python dictionaries, each having 2 keys: path and data.
- The path contains path following the YANG model (OpenConfig in your case).
- The data contains the information needed to configure the resource at the destination of the provided path.
#2. Parsing JSON data
Now, when we have the new data structure, we need to import it in our Python code. For Python, the JSON text, or any other text, is just a text, multiline string, until it is processed by a specific module to create a Python dictionary out of it. For a JSON data, the Python has a module called json, which is part of the standard distribution. So we need to import this module and use a specific function loads(), which will convert the JSON text into a dictionary. But, obviously, we need to open file and read its content beforehand. To achieve that, we create the following user-defined function:
2
3
4
5
6
7
8
9
10
11
12
13
14
15
16
17
18
19
20
21
22
23
24
25
26
27
#!/usr/bin/env python
# Modules
import grpc
from bin.gnmi_pb2_grpc import *
from bin.gnmi_pb2 import *
import re
import sys
import json
# Variables
path = {'inventory': 'inventory/inventory.json', 'network_functions': 'inventory/network_functions'}
# User-defined functions
def json_to_dict(path):
with open(path, 'r') as f:
return json.loads(f.read())
!
! SOME OUTPUT IS TRUNCATED FOR BREVITY
!
if __name__ == '__main__':
inventory = json_to_dict(path['inventory'])
!
! FURTHER OUTPUT IS TRUNCATED FOR BREVITY
The basis of the set_gnmi.py is the get_gnmi.py file.
This user-defined function is used to get the file following the provided path, read its content and convert it into the JSON. Obviously, it is assumed that the file has a correct syntax and follows the YANG data model supported but the devices. In the snippet above you see the usage of the function to parse the inventory data. In reality it is used also to convert the per network function data, as you can see in the full code in our GitHub repository.
#3. Configure devices using the gRPC and gNMI
In general, the new file, which is called set_gnmi.py is not dramatically different to get_gnmi.py, which we have created the last time. Hence, we will show the code and then explain the key components, which deviate from the previous:
2
3
4
5
6
7
8
9
10
11
12
13
14
15
16
17
18
19
20
21
22
23
24
25
26
27
28
29
30
31
32
!
! SOME OUTPUT IS TRUNCATED FOR BREVITY
!
# Body
if __name__ == '__main__':
inventory = json_to_dict(path['inventory'])
for td_entry in inventory['network_functions']:
metadata = [('username', td_entry['username']), ('password', td_entry['password'])]
grpc_connection = grpc.insecure_channel(f'{td_entry["ip_address"]}:{td_entry["port"]}', metadata)
grpc.channel_ready_future(grpc_connection).result(timeout=5)
gnmi_interface = gNMIStub(grpc_connection)
device_data = json_to_dict(f'{path["network_functions"]}/{td_entry["hostname"]}.json')
gnmi_message = []
for itc_entry in device_data['intent_config']:
print(f'Setting data for the {itc_entry} data from {td_entry["ip_address"]} over gNMI...\n\n')
intent_path = gnmi_path_generator(itc_entry['path'])
intent_config = json.dumps(itc_entry['data']).encode('utf-8')
gnmi_message.append(Update(path=intent_path, val=TypedValue(json_val=intent_config)))
gnmi_message_request = SetRequest(update=gnmi_message)
gnmi_message_response = gnmi_interface.Set(gnmi_message_request, metadata=metadata)
print(gnmi_message_response)
Read the previous blogpost to get the understanding on the workflow in this Python script.
The new key differences are:
- The variable device_data contains the parsed information, which is related to the network element.
- The variable gnmi_message is a list, which will contain all the requests, which shall be done towards a network element.
- Using the dictionary intent_config from the parsed per network function data device_data the for-loop is created to generate the Update messages, which will be used upon the device configuration.
- The intent_path and gnmi_path_generator() were explained in the previous blogpost.
- The variable intent_config is a byte stream created out of the data key.
- Further some Protobuf magic is happening: the message Update is created using the generated path, generated using Path message, and value, generated using TypedValue message, which is generated using the json_val type and a created byte stream intent_config (all these messages are provided in gnmi.proto file.)
- Each the Update message is added to an original gnmi_message list.
- Using the Protobuf schema SetRequest, we generate the object containing all the Update messages we want to send to the network function.
- Using the Protobuf schema Set from gnmi_grpc.proto we push the configuration down to the network element and collects the SetResponses into gnmi_message_response variable.
- To do a simple verification, we check, what’s inside
To get more clarity on the messages, you need to take a look into gnmi.proto files and be able to read Protobuf format. Let’s start with the SetRequest:
2
3
4
5
6
7
8
9
10
11
12
13
14
15
16
// tree. Paths are either deleted by the client, or modified by means of being
// updated, or replaced. Where a replace is used, unspecified values are
// considered to be replaced, whereas when update is used the changes are
// considered to be incremental. The set of changes that are specified within
// a single SetRequest are considered to be a transaction.
// Reference: gNMI Specification Section 3.4.1
message SetRequest {
Path prefix = 1; // Prefix used for paths in the message.
repeated Path delete = 2; // Paths to be deleted from the data tree.
repeated Update replace = 3; // Updates specifying elements to be replaced.
repeated Update update = 4; // Updates specifying elements to updated.
// Extension messages associated with the SetRequest. See the
// gNMI extension specification for further definition.
repeated gnmi_ext.Extension extension = 5;
}
The gnmi.proto has quite a decent built-in documentation; hence, from the nipper above you may see, that using this request we can:
- Delete the configuration from a certain path (then we need to provide an entry using the Path message) using the delete key.
- Modify (merge) the configuration using the Update message and update key.
- Replace the configuration using the Update message and replace key.
The message Path was explained in the previous part, so we don’t cover it once more. Instead, we look at Update:
2
3
4
5
6
7
8
9
// Value pair.
// Reference: gNMI Specification Section 2.1
message Update {
Path path = 1; // The path (key) for the update.
Value value = 2 [deprecated=true]; // The value (value) for the update.
TypedValue val = 3; // The explicitly typed update value.
uint32 duplicates = 4; // Number of coalesced duplicates.
}
This message contains the reference to Path itself; hence, we have provided path in the per network function data variables. The key new component is a parameter val, which shall take a data in TypedValue message format:
2
3
4
5
6
7
8
9
10
11
12
13
14
15
16
17
18
19
20
21
22
23
24
25
26
27
28
// target (originated by either entity).
message TypedValue {
// One of the fields within the val oneof is populated with the value
// of the update. The type of the value being included in the Update
// determines which field should be populated. In the case that the
// encoding is a particular form of the base protobuf type, a specific
// field is used to store the value (e.g., json_val).
oneof value {
string string_val = 1; // String value.
int64 int_val = 2; // Integer value.
uint64 uint_val = 3; // Unsigned integer value.
bool bool_val = 4; // Bool value.
bytes bytes_val = 5; // Arbitrary byte sequence value.
float float_val = 6; // Floating point value.
Decimal64 decimal_val = 7; // Decimal64 encoded value.
ScalarArray leaflist_val = 8; // Mixed type scalar array value.
google.protobuf.Any any_val = 9; // protobuf.Any encoded bytes.
bytes json_val = 10; // JSON-encoded text.
bytes json_ietf_val = 11; // JSON-encoded text per RFC7951.
string ascii_val = 12; // Arbitrary ASCII text.
// Protobuf binary encoded bytes. The message type is not included.
// See the specification at
// github.com/openconfig/reference/blob/master/rpc/gnmi/protobuf-vals.md
// for a complete specification.
bytes proto_bytes = 13;
}
}
There are multiple possible to provide the data. However, as we have learned in the previous one, json_val is the only common between the Arista EOS and Nokia SR OS for polling the date. Hence, we are using it in our script. On a side note, perhaps, the best format would be the Protobuf encoded data, as it shall not contain the JSON framing. Unfortunately, there are no vendors supporting such an approach to configure the network elements.
gNMI it all
Assuming that our Python script is correct and doesn’t have errors, we can try to test it.
#1. Configuring Arista EOS with gRPC transport, gNMI specification and OpenConfig YANG modules
The key component for the configuration in the Python tool we have developed is the input data. The simple goal is to configure the interfaces and their IP addresses using OpenConfig YANG modules so that the devices can reach each other. For Arista EOS we ultimately have the following input data:
2
3
4
5
6
7
8
9
10
11
12
13
14
15
16
17
18
19
20
21
22
23
24
25
26
27
28
29
30
31
32
33
34
35
36
37
38
39
40
41
42
43
44
45
46
47
48
49
50
51
52
53
54
55
56
57
58
59
60
61
62
63
64
65
66
67
68
69
70
71
72
73
74
75
76
77
78
79
{
"intent_config": [
{
"path": "openconfig-interfaces:interfaces/interface[name=Ethernet1]",
"data": {
"name": "Ethernet1",
"config": {
"name": "Ethernet1",
"enabled": true,
"type": "iana-if-type:ethernetCsmacd",
"description": "Test IF 1"
},
"subinterfaces": {
"subinterface": [
{
"index": 0,
"config": {
"index": 0,
"enabled": true
},
"openconfig-if-ip:ipv4": {
"addresses": {
"address": [
{
"ip": "10.0.0.0",
"config": {
"ip": "10.0.0.0",
"prefix-length": 31,
"addr-type": "PRIMARY"
}
}
]
}
}
}
]
}
}
},
{
"path": "openconfig-interfaces:interfaces/interface[name=Loopback1]",
"data": {
"name": "Loopback1",
"config": {
"name": "Loopback1",
"enabled": true,
"type": "iana-if-type:softwareLoopback",
"description": "Test IF 2"
},
"subinterfaces": {
"subinterface": [
{
"index": 0,
"config": {
"index": 0,
"enabled": true
},
"openconfig-if-ip:ipv4": {
"addresses": {
"address": [
{
"ip": "10.1.255.62",
"config": {
"ip": "10.1.255.62",
"prefix-length": 32,
"addr-type": "PRIMARY"
}
}
]
}
}
}
]
}
}
}
]
}
As explained above, the data key contains a information we intent to configure for the resource at path key. This is a canonical OpenConfig YANG module for interfaces.
First of all, we check the configuration of the Arista EOS device before we run our Python script:
2
3
4
5
6
7
Address
Interface IP Address Status Protocol MTU Owner
----------------- ----------------------- ------------ -------------- ---------- -------
Ethernet1 unassigned up up 1500
Ethernet2 unassigned up up 1500
Management1 169.254.255.62/24 up up 1500
Now we can run the provisioning:
2
3
4
5
6
7
8
9
10
11
12
13
14
15
16
17
18
19
20
21
22
23
24
25
26
27
28
29
30
31
32
33
34
35
36
37
38
39
Setting data for the {'path': 'openconfig-interfaces:interfaces/interface[name=Ethernet1]', 'data': {'name': 'Ethernet1', 'config': {'name': 'Ethernet1', 'enabled': True, 'type': 'iana-if-type:ethernetCsmacd', 'description': 'Test IF 1'}, 'subinterfaces': {'subinterface': [{'index': 0, 'config': {'index': 0, 'enabled': True}, 'openconfig-if-ip:ipv4': {'addresses': {'address': [{'ip': '10.0.0.0', 'config': {'ip': '10.0.0.0', 'prefix-length': 31, 'addr-type': 'PRIMARY'}}]}}}]}}} data from 169.254.255.62 over gNMI...
Setting data for the {'path': 'openconfig-interfaces:interfaces/interface[name=Loopback1]', 'data': {'name': 'Loopback1', 'config': {'name': 'Loopback1', 'enabled': True, 'type': 'iana-if-type:softwareLoopback', 'description': 'Test IF 2'}, 'subinterfaces': {'subinterface': [{'index': 0, 'config': {'index': 0, 'enabled': True}, 'openconfig-if-ip:ipv4': {'addresses': {'address': [{'ip': '10.1.255.62', 'config': {'ip': '10.1.255.62', 'prefix-length': 32, 'addr-type': 'PRIMARY'}}]}}}]}}} data from 169.254.255.62 over gNMI...
response {
path {
origin: "openconfig-interfaces"
elem {
name: "interfaces"
}
elem {
name: "interface"
key {
key: "name"
value: "Ethernet1"
}
}
}
op: UPDATE
}
response {
path {
origin: "openconfig-interfaces"
elem {
name: "interfaces"
}
elem {
name: "interface"
key {
key: "name"
value: "Loopback1"
}
}
}
op: UPDATE
}
We are printing in the STDOUT the gNMI responses, so you see that we have performed the operation UPDATE at a specific TIMESTAMP. So far the output after the execution of our Python script is positive. Hence, we assume that configuration of the Arista EOS based network function with gRPC using the gNMI specification and OpenConfig YANG modules was successful. As such, we can check the output in CLI:
2
3
4
5
6
7
8
Address
Interface IP Address Status Protocol MTU Owner
----------------- ----------------------- ------------ -------------- ----------- -------
Ethernet1 10.0.0.0/31 up up 1500
Ethernet2 unassigned up up 1500
Loopback1 10.1.255.62/32 up up 65535
Management1 169.254.255.62/24 up up 1500
Indeed the configuration was successful! Let’s take a look, whether the another vendor is working in the same way.
#2. Configuring Nokia SR OS with gRPC transport, gNMI specification and OpenConfig YANG modules
We won’t do too much dramatic pause, as Nokia SR OS is not the same in terms of the configuration, even if we speak about OpenConfig.
Same problem we have earlier with NETCONF, so it is pure Nokia OpenConfig implementation caveats.
Nokia SR OS OpenConfig implementation differs from Arista EOS:
- In Nokia we don’t us the module prefix for augmenting modules (e.g. openconfig-if-ip or iana-if-type), what we do in Arista, and what we should do per standard.
- In Nokia we also need to enable the address-family for interfaces under the openconfig-network-instance module.
All these points are taking into account upon producing the input:
2
3
4
5
6
7
8
9
10
11
12
13
14
15
16
17
18
19
20
21
22
23
24
25
26
27
28
29
30
31
32
33
34
35
36
37
38
39
40
41
42
43
44
45
46
47
48
49
50
51
52
53
54
55
56
57
58
59
60
61
62
63
64
65
66
67
68
69
70
71
72
73
74
75
76
77
78
79
80
81
82
83
84
85
86
87
88
89
90
91
92
93
94
95
96
97
98
99
100
101
102
103
104
105
106
107
108
109
110
111
112
113
{
"intent_config": [
{
"path": "openconfig-interfaces:interfaces/interface[name=1/1/c1/1]",
"data": {
"name": "1/1/c1/1",
"config": {
"name": "1/1/c1/1",
"enabled": true,
"type": "ethernetCsmacd",
"description": "Test IF 1"
},
"subinterfaces": {
"subinterface": [
{
"index": 0,
"config": {
"index": 0,
"enabled": true
},
"ipv4": {
"addresses": {
"address": [
{
"ip": "10.0.0.1",
"config": {
"ip": "10.0.0.1",
"prefix-length": 31
}
}
]
}
}
}
]
}
}
},
{
"path": "openconfig-interfaces:interfaces/interface[name=system]",
"data": {
"name": "system",
"config": {
"name": "system",
"enabled": true,
"type": "softwareLoopback",
"description": "Test IF 2"
},
"subinterfaces": {
"subinterface": [
{
"index": 0,
"config": {
"index": 0,
"enabled": true
},
"ipv4": {
"addresses": {
"address": [
{
"ip": "10.1.255.64",
"config": {
"ip": "10.1.255.64",
"prefix-length": 32
}
}
]
}
}
}
]
}
}
},
{
"path": "openconfig-network-instance:network-instances/network-instance[name=Base]",
"data": {
"name": "Base",
"config": {
"name": "Base",
"type": "DEFAULT_INSTANCE"
},
"interfaces": {
"interface": [
{
"id": "1/1/c1/1.0",
"config": {
"associated-address-families": [
"IPV4"
],
"id": "1/1/c1/1.0",
"interface": "1/1/c1/1",
"subinterface": 0
}
},
{
"id": "system.0",
"config": {
"associated-address-families": [
"IPV4"
],
"id": "system.0",
"interface": "system",
"subinterface": 0
}
}
]
}
}
}
]
}
The data snippet was long, but you have a clear view, what shall be configured on the network function running now. As such, let’s run the provisioning to Nokia SR OS network function.
2
3
4
5
6
7
8
9
10
11
12
13
14
15
16
17
18
19
20
21
22
23
24
25
26
27
28
29
30
31
32
33
34
35
36
37
38
39
40
41
42
43
44
45
46
47
48
49
50
51
52
53
54
55
56
57
58
59
60
Setting data for the {'path': 'openconfig-interfaces:interfaces/interface[name=1/1/c1/1]', 'data': {'name': '1/1/c1/1', 'config': {'name': '1/1/c1/1', 'enabled': True, 'type': 'ethernetCsmacd', 'description': 'Test IF 1'}, 'subinterfaces': {'subinterface': [{'index': 0, 'config': {'index': 0, 'enabled': True}, 'ipv4': {'addresses': {'address': [{'ip': '10.0.0.1', 'config': {'ip': '10.0.0.1', 'prefix-length': 31}}]}}}]}}} data from 169.254.255.64 over gNMI...
Setting data for the {'path': 'openconfig-interfaces:interfaces/interface[name=system]', 'data': {'name': 'system', 'config': {'name': 'system', 'enabled': True, 'type': 'softwareLoopback', 'description': 'Test IF 2'}, 'subinterfaces': {'subinterface': [{'index': 0, 'config': {'index': 0, 'enabled': True}, 'ipv4': {'addresses': {'address': [{'ip': '10.1.255.64', 'config': {'ip': '10.1.255.64', 'prefix-length': 32}}]}}}]}}} data from 169.254.255.64 over gNMI...
Setting data for the {'path': 'openconfig-network-instance:network-instances/network-instance[name=Base]', 'data': {'name': 'Base', 'config': {'name': 'Base', 'type': 'DEFAULT_INSTANCE'}, 'interfaces': {'interface': [{'id': '1/1/c1/1.0', 'config': {'associated-address-families': ['IPV4'], 'id': '1/1/c1/1.0', 'interface': '1/1/c1/1', 'subinterface': 0}}, {'id': 'system.0', 'config': {'associated-address-families': ['IPV4'], 'id': 'system.0', 'interface': 'system', 'subinterface': 0}}]}}} data from 169.254.255.64 over gNMI...
response {
path {
origin: "openconfig-interfaces"
elem {
name: "interfaces"
}
elem {
name: "interface"
key {
key: "name"
value: "1/1/c1/1"
}
}
}
op: UPDATE
}
response {
path {
origin: "openconfig-interfaces"
elem {
name: "interfaces"
}
elem {
name: "interface"
key {
key: "name"
value: "system"
}
}
}
op: UPDATE
}
response {
path {
origin: "openconfig-network-instance"
elem {
name: "network-instances"
}
elem {
name: "network-instance"
key {
key: "name"
value: "Base"
}
}
}
op: UPDATE
}
timestamp: 1591043865500661266
And after the configuration is implemented, we see that in operation:
2
3
4
5
6
7
8
9
10
11
12
13
14
15
===============================================================================
Interface Table (Router: Base)
===============================================================================
Interface-Name Adm Opr(v4/v6) Mode Port/SapId
IP-Address PfxState
-------------------------------------------------------------------------------
oc_1/1/c1/1_0 Up Up/Down Network 1/1/c1/1
10.0.0.1/31 n/a
system Up Up/Down Network system
10.1.255.64/32 n/a
-------------------------------------------------------------------------------
Interfaces : 2
===============================================================================
Concluding that we have implemented the management of the devices using the gRPC transport with gNMI specification and OpenConfig YANG modules.
GitHub repository
Our GitHub contains the latest state of our project in gRPC/gNMI network automation.


Lessons learned
We have had to modify the content of the gnmi_path_generator() function. The reason for that is that we have originally implemented splitting of the original path by ‘/‘ symbol. However, the Nokia SR OS based network functions have the name of the ports such as ‘1/1/c1/1‘ or Cisco have something like ‘GigabitEthernet0/0/0/1‘. As such, we have implemented the modification to the original user-defined function, which creates the path. Now the value of the user’s key doesn’t affect the build of the path, so you can build any complex path. We bet, your can.
Conclusion
With this blogpost we conclude the management of the network elements using the gRPC transport, gNMI specification and OpenConfig YANG modules. The capability is enormous. We will share in a future some more things on the telemetry with gNMI, but for now you see the things how to manage the devices and how to collect the details. Take care and good bye.
Support us
P.S.
If you have further questions or you need help with your networks, I’m happy to assist you, just send me message. Also don’t forget to share the article on your social media, if you like it.
BR,
Anton Karneliuk