

Hello my friend,
For a a while we were silent about pyGNMI; however, it doesn’t mean that the project is abandoned. Actually, it is quite opposite: we are very delighted and thankful for the community that we have a number of contributors from the whole world, who is taking part in the pyGNMI project and committing new code. Thanks to the community, a few new features were added as well as a number of bugs fixed. And today we will take a look one of such community-added features, which is called pygnmcli.
2
3
4
5
retrieval system, or transmitted in any form or by any
means, electronic, mechanical or photocopying, recording,
or otherwise, for commercial purposes without the
prior permission of the author.
Is GNMI a Good Interface for Network Automation?
Yes, it is. GNMI is one of the most recent interfaces created for the management plane, which allows you to manage the network devices (i.e., retrieve configuration and operational data, modify configuration) and collect the streaming or event-driven telemetry. Sounds like one-size-fits-all, isn’t it? On top of that, GNMI supports also different transport channels (i.e., encrypted and non-encrypted), which makes it suitable both for lab testing and for production environment. You may feel that we are biased to gNMI, and you are right. Actually, that is a reason why we created pyGNMI library, Open Source library for network automation with Python and GNMI.
At our trainings, advanced network automation and automation with Nornir (2nd step after advanced network automation), we give you detailed knowledge of all the technologies relevant:
- Success and failure strategies to build the automation tools.
- Principles of software developments and tools for that.
- Data encoding (free-text, XML, JSON, YAML, Protobuf)
- Model-driven network automation with YANG, NETCONF, RESTCONF, GNMI.
- Full configuration templating with Jinja2 based on the source of truth (NetBox).
- Best programming languages (Python, Bash) for developing automation, configuration management tools (Ansible) and automation frameworks (Nornir).
- Network automation infrastructure (Linux, Linux networking, KVM, Docker).
Anton has a very good and structured approach to bootstrap you in the network automation field.
Angel Bardarov @ Telelink Business Services
Moreover, we put all mentions technologies in the context of the real use cases, which our team has solved and are solving in various projects in the service providers, enterprise and data centre networks and systems across the Europe and USA. That gives you opportunity to ask questions to understand the solutions in-depts and have discussions about your own projects. And on top of that, each technology is provided with online demos and you are doing the lab afterwards to master your skills. Such a mixture creates a unique learning environment, which all students value so much. Join us and unleash your potential.
Brief Description
To be frank, we on purpose were avoiding creating a CLI version of pygnmi primary for two reasons:
- We create ourselves network automation in Python mainly for a purpose to do end-to-end automation, which involves API gateways, web hooks and other components, which generally doesn’t foresee the CLI.
- There is also gnmic tool created by Nokia folks with a primary purpose to interact with devices over CLI. Creating yet another tool is not very interesting for us.
At the same time, we have received a few comments from the network automation community asking for a CLI tool, which would allow them to use pygnmi as a one-stop-shop for interaction with network devices over GNMI. Well, as it appears, that there is a demand for such a tool, then we will provide a supply.
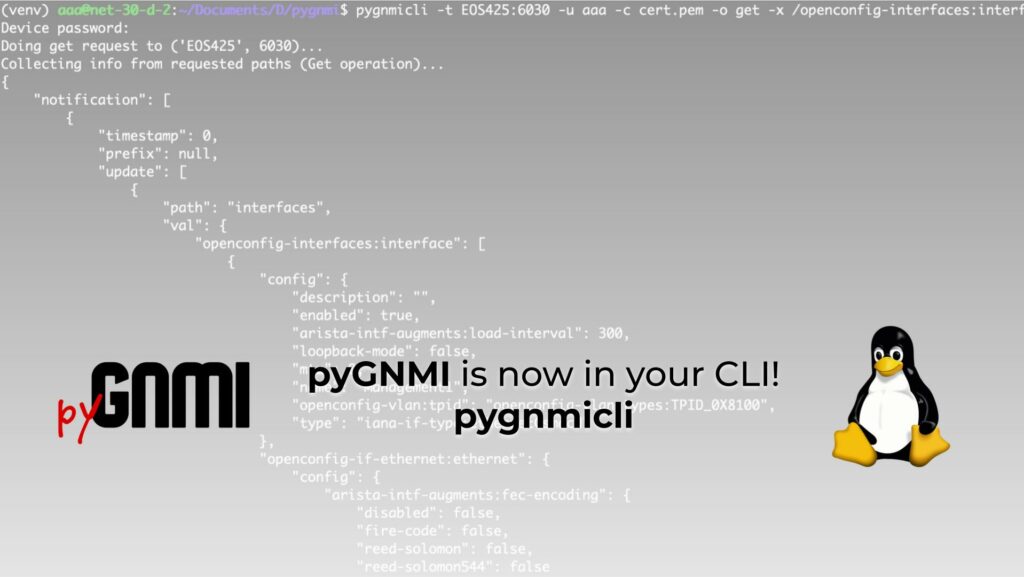
So, what is pygnmicli?
It is a CLI tool for Linux, created in Python. Under the hood, it relies on the very same pygnmi library. In fact, you even don’t have to install it separately: once you install pygnmi, it is already available for you.
The primary purpose of the pygnmicli is to give network engineers, who are transitioning to the network automation field, to get quick exposure to GNMI management protocol, so that they can better understand the power of GNMI.
As pygnmicli for all operations relies on pygnmi, it means that everything, what pygnmi is capable of, is available for you directly in Linux CLI. To be precise, with pygnmicli you can perform:
- Capabilities RPC
- Get RPC
- Set RPC
- Subscribe RPC
It also supports both encrypted (using TLS) and un-encrypted (without TLS) gRPC channels. Let’s see how it works.
Join our Network Automation Training to learn the details of GNMI and how to use it.
Lab Setup
In this blogpost we continue using the topology, we have used in all other blogposts in pygnmi series:

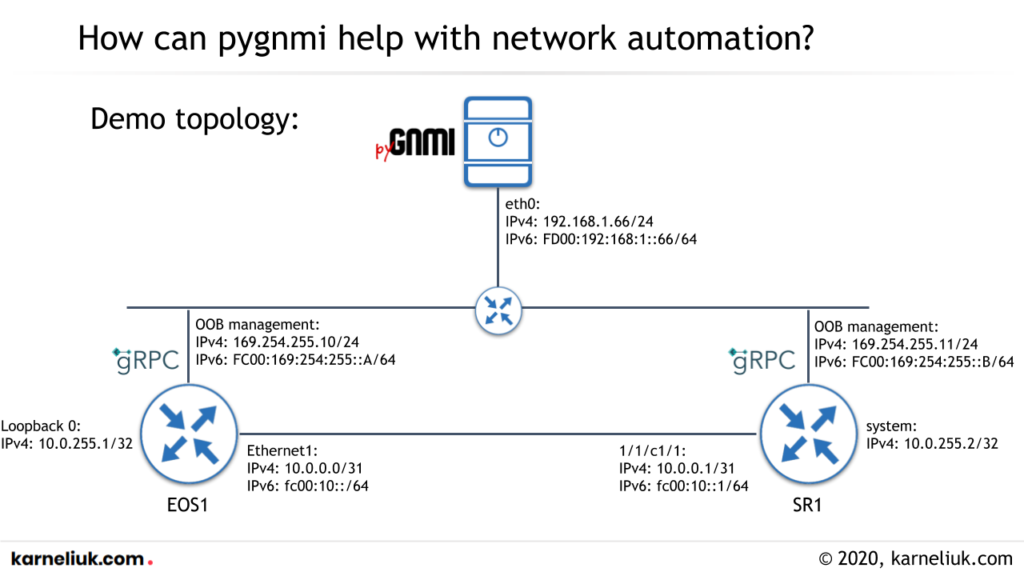
The functionality of pygnmicli relies on pygnmi. As we have already covered its functionality in separate videos against multiple vendors, we will focus today only on CLI aspect. As such, we will run it only against a single device for a sake of brevity.
At our Zero-To-Hero Network Automation Training you have possibility to create your network automation with GNMI for multiple vendors.
Pygnmi Usage
As said beforehand, the pygnmicli is installed automatically, when you install pygnmi via pip:
Once this is done, you can start using it. For example, you could start with built-in help:
2
3
4
5
6
7
8
9
10
11
12
13
14
15
16
17
18
19
20
21
22
23
24
25
26
27
28
29
30
usage: pygnmicli [-h] -t TARGET -u USERNAME [-p PASSWORD] [-c PATH_CERT] [-k PATH_KEY] [-r PATH_ROOT] [-O OVERRIDE] [-i]
[-o {capabilities,get,set-update,set-replace,set-delete,subscribe-stream,subscribe-poll,subscribe-once,subscribe2}] [-x GNMI_PATH [GNMI_PATH ...]]
[-d [{all,config,operational,state}]] [-f FILE] [-D]
optional arguments:
-h, --help show this help message and exit
-t TARGET, --target TARGET
Target device connection details in 'host:port' format
-u USERNAME, --user USERNAME
Username to use when connecting
-p PASSWORD, --pass PASSWORD
Password to use when connecting
-c PATH_CERT, --path_cert PATH_CERT
Path to certificate chain file
-k PATH_KEY, --path_key PATH_KEY
Path to private key file
-r PATH_ROOT, --path_root PATH_ROOT
Path to root CA file
-O OVERRIDE, --override OVERRIDE
Override the expected server hostname to match certificate name
-i, --insecure Set to disable TLS encryption on the gRPC channel
-o {capabilities,get,set-update,set-replace,set-delete,subscribe-stream,subscribe-poll,subscribe-once,subscribe2}, --operation {capabilities,get,set-update,set-replace,set-delete,subscribe-stream,subscribe-poll,subscribe-once,subscribe2}
gNMI Request type
-x GNMI_PATH [GNMI_PATH ...], --gnmi_path GNMI_PATH [GNMI_PATH ...]
gNMI paths of interest in XPath format, space separated
-d [{all,config,operational,state}], --datastore [{all,config,operational,state}]
Which datastore to operate on
-f FILE, --file FILE Path to file containing JSON data to use in a set request
-D, --print Set to enable printing of Protobuf messages to STDOUT
Let’s take a look at various practical cases, how you can use pygnmicli.
Case #1. Capabilities RPC with Insecure gRPC Channel
First of all, let’s check how to connect to the network device, if it doesn’t have TLS setup (i.e., you should use insecure gRPC channel):
2
3
4
5
6
7
8
9
10
11
12
13
14
15
16
17
18
19
Device password:
Doing capabilities request to ('169.254.255.10', 6030)...
Collecting Capabilities...
Collection of Capabilities is successfull
{
"supported_models": [
{
"name": "openconfig-if-poe",
"organization": "OpenConfig working group",
"version": "0.1.1"
},
{
"name": "arista-openflow-deviations",
"organization": "Arista Networks, Inc.",
"version": ""
},
!
! FURTHER OUTPUT IS TRUNCATED FOR BREVITY
In this scenario we you use the following keys:
| Key | Meaning |
|---|---|
| -t, –target | Host (can be FQDN, IPv4 or IPv6) and TCP port, which are used for GNMI session |
| -u, –user | Username you would use to connect to the network device |
| -i, –insecure | gRPC channel is not encrypted with TLS |
| -o, –operation | GNMI RPC, which you want to run against the device |
As you can see, the output is already converted to JSON format for your simplicity to read the output.
Case #2. Capabilities RPC with Secure gRPC Channel with Override
The next step is bring the TLS protection to the session. However, at this stage you don’t have FQDN and PKI and, therefore, you would need to override some fields in the certificate:
2
3
4
5
6
7
8
9
10
11
12
13
14
15
16
17
18
19
Device password:
Doing capabilities request to ('169.254.255.10', 6030)...
Collecting Capabilities...
Collection of Capabilities is successfull
{
"supported_models": [
{
"name": "arista-network-instance-notsupported-deviations",
"organization": "Arista Networks, Inc.",
"version": ""
},
{
"name": "arista-srte-augments",
"organization": "Arista Networks, Inc.",
"version": ""
},
!
! FURTHER OUTPUT IS TRUNCATED FOR BREVITY
You can see a few new keys:
| Key | Meaning |
|---|---|
| -c, –path_cert | The path to the self-signed certificate on your host with pyGNMI (you should download it from the network device somehow or just copy from its CLI) |
| -O, –override | The subject field in the certificate, which you would like to amend. E.g, if the self-signed certificate is created for the device’s hostname, you would need to alter that in order validation can be passed |
Case #3. Capabilities RPC with Secure gRPC Channel
If you have DNS properly setup in your network (or you can modify /etc/hosts) on your host, then you don’t need to use override functionality. Alternatively, you use hostname, which shall be the same as in the certificate, in the target field:
2
3
4
5
6
7
8
9
10
11
12
13
14
15
16
17
18
19
Device password:
Doing capabilities request to ('EOS1', 6030)...
Collecting Capabilities...
Collection of Capabilities is successfull
{
"supported_models": [
{
"name": "openconfig-packet-match",
"organization": "OpenConfig working group",
"version": "1.1.1"
},
{
"name": "openconfig-igmp",
"organization": "OpenConfig working group",
"version": "0.2.0"
},
!
! FURTHER OUTPUT IS TRUNCATED FOR BREVITY
Case #4. Get RPC
Once you have cleared all the connectivity options (i.e, both encrypted and unencrypted gRPC channels), which were demonstrated using Capabilities RPC, it is time now to take a look at other RPCs. Get RPC is the next on our list:
2
3
4
5
6
7
8
9
10
11
12
13
14
15
16
17
18
19
20
21
22
23
24
25
26
27
Device password:
Doing get request to ('EOS1', 6030)...
Collecting info from requested paths (Get operation)...
{
"notification": [
{
"timestamp": 0,
"prefix": null,
"update": [
{
"path": "interfaces",
"val": {
"openconfig-interfaces:interface": [
{
"config": {
"description": "",
"enabled": true,
"arista-intf-augments:load-interval": 300,
"loopback-mode": false,
"mtu": 0,
"name": "Management1",
"openconfig-vlan:tpid": "openconfig-vlan-types:TPID_0X8100",
"type": "iana-if-type:ethernetCsmacd"
},
!
! FURTHER OUTPUT IS TRUNCATED FOR BREVITY
When you do Get RPC, you need to provide also the path, which you are willing to poll information from. To do that, you need a new key:
| Key | Meaning |
|---|---|
| -x, –gnmi_path | This is a XPath expressed in a string, which is converted by pygnmi to a GNMI path |
Case #5. Get RPC with Debug Option
If you are interested in the Protobuf messages, rather than converted data, you can get this data by pygnmicli as well:
2
3
4
5
6
7
8
9
10
11
12
13
14
15
16
17
18
19
20
21
22
23
24
25
26
27
28
29
30
31
32
33
34
Device password:
Doing get request to ('EOS425', 6030)...
Collecting info from requested paths (Get operation)...
gNMI request:
------------------------------------------------
prefix {
}
path {
origin: "openconfig-interfaces"
elem {
name: "interfaces"
}
}
------------------------------------------------
gNMI response:
------------------------------------------------
notification {
prefix {
}
update {
path {
elem {
name: "interfaces"
}
}
val {
json_ietf_val: "{"openconfig-interfaces:interface":[{"config":{"description":"","enabled":true,"arista-intf-augments:load-interval":300,"loopback-mode":false,"mtu":0,"name":"Management1","openconfig-vlan:tpid":"openc
!
! FURTHER OUTPUT IS TRUNCATED FOR BREVITY
Again, there is a dedicated key to get this output:
| Key | Meaning |
|---|---|
| -D, –debug | Boolean variable, which allows you to specify if you are interested to see the details. |
Case #6. Set RPC with Reading from File
Besides possibility to collect the information from the network device with pygnmicli, you can also push the new configuration. For example, you want to create a new interface. First, you’d need to create configuration file in a json format:
2
3
4
5
6
7
8
9
10
{
"name": "Loopback61",
"config": {
"name": "Loopback61",
"type": "softwareLoopback",
"enabled": true,
"description": "pygnmicli-created-interface"
}
}
The information from this file is used in the next call:
2
3
4
5
6
7
8
9
10
11
Device password:
Doing set-update request to ('EOS1', 6030)...
{
"response": [
{
"path": "interfaces/interface[name=Loopback61]",
"op": "UPDATE"
}
]
}
Having “UPDATE” in the response is a good sign, by the way. You can see a new key as well:
| Key | Meaning |
|---|---|
| -f, –file | String variable providing path to the JSON file with the variables for configuration. |
Case #7. Capabilities RPC of Stream Type
If you want to test telemetry, this is also possible with pygnmicli. You just need to specify, which type of subscription (poll, stream or once) you want to test and to run the tool with the corresponding operation type:
2
3
4
5
Device password:
{'update': {'update': [{'path': 'interfaces/interface[name=Management1]/config/description', 'val': ''}, {'path': 'interfaces/interface[name=Management1]/config/enabled', 'val': True}, {'path': 'interfaces/interface[name=Management1]/config/load-interval', 'val': 300}, {'path': 'interfaces/interface[name=Management1]/config/loopback-mode', 'val': False}, {'path': 'interfaces/interface[name=Management1]/config/mtu', 'val': 0}, {'path': 'interfaces/interface[name=Management1]/config/name', 'val': 'Management1'}, {'path': 'interfaces/interface[name=Management1]/config/tpid', 'val': 'openconfig-vlan-types:TPID_0X8100'}, {'path': 'interfaces/interface[name=Management1]/config/type', 'val': 'iana-if-type:ethernetCsmacd'}, {'path': 'interfaces/interface[name=Management1]/ethernet/config/fec-encoding/disabled', 'val': False}, {'path': 'interfaces/interface[name=Management1]/ethernet/confi
!
! FURTHER OUTPUT IS TRUNCATED FOR BREVITY
As you see, there are no new keys, as Subscribe RPC takes the path from the -x argument, which we already have covered above.
If You Prefer Video
Watch out the video demo of the pygnmicli:

You can watch other demos from pygnmi blogs in our YouTube channel.
Examples in GitHub
You can find this and other examples in our GitHub repository.
Lessons Learned
We are truly inspired by the way how the pygnmi developed over a past few month, where the network automation community played a key role in development of new features and fixing bugs. What we figured out is that in many cases those advancements we driven by needs of individuals and, therefore, implemented. We believe in this approach of natural development, as it is very pragmatic: solving the practical cases and adapting solutions for that serves the individual as well as the community in general.
Conclusion
pyGNMI has taken off the ground and with the help of the network automaton community, which members uses it and contributes to it. We believe that further popularisation of gNMI is inevitable, though we admit that this can be de-routed. However, at the moment it looks like gNMI will be with us for a while and pyGNMI is here for you to make the maximum use of gNMI for your networks. We encourage you to use the GitHub repo to raise requests or your suggestions to keep it development further. Take care and good bye.
Support us
P.S.
If you have further questions or you need help with your networks, we are happy to assist you, just send us a message. Also don’t forget to share the article on your social media, if you like it.
BR,
Anton Karneliuk